


TF Beechcraft Bonanza F33A Build
 07-13-2019, 01:00 AM
#101

Thread Starter
Mike, my preferred glue to build with as you know is Titebond II. The original Titebond glue was and still very popular and is a fine glue to use. Titebond II is designed for exterior use while its predecessor was not. It's also a bit stronger as well. Both sand very easily and both are unaffected by finishes. I never dilute my wood glue and use it straight out of the bottle. I really don't see the need to do this as it penetrates the wood pores well and in my mind, diluting the glue will weaken its overall strength. I also make sure that my glue is fresh, meaning that it has a shelf life. When I start a new project I always start a new bottle.
I like the open time that it affords me. It gives me the time I need so I don't feel rushed when assembling sticks. Maybe to some builders, this glue is too slow for them, but it suites my building style... It's relatively inexpensive , doesn't have any fumes and is available at just about any hardware store or lumber yard. What's not to like about it?
I like the open time that it affords me. It gives me the time I need so I don't feel rushed when assembling sticks. Maybe to some builders, this glue is too slow for them, but it suites my building style... It's relatively inexpensive , doesn't have any fumes and is available at just about any hardware store or lumber yard. What's not to like about it?
Last edited by VincentJ; 07-13-2019 at 10:48 AM.
 07-14-2019, 01:40 AM
#102
Thread Starter
Slight holding pattern. I've got all of the ribs fitted nicely on the right wing half, but I'm hesitant to pop the cork on the glue bottle just yet. I recently ordered navigational lights and I'm unsure as to where or how large of an opening I will need to make on each rib for the wires to pass.  It will be easier for me to remove the ribs and drill them first before proceeding. Shouldn't be more that a couple of days delay...
It will be easier for me to remove the ribs and drill them first before proceeding. Shouldn't be more that a couple of days delay...
The following users liked this post:
jlhambright (04-29-2024)
 07-14-2019, 05:09 PM
#104
Thread Starter
07-17-2019, 05:52 AM
#107
Thread Starter
On another note, the time off has allowed my finger to recuperate. The finger brace is off and I can almost bend it as well as before!
Last edited by VincentJ; 07-17-2019 at 06:01 AM.


 07-17-2019, 01:32 PM
#111
Thread Starter
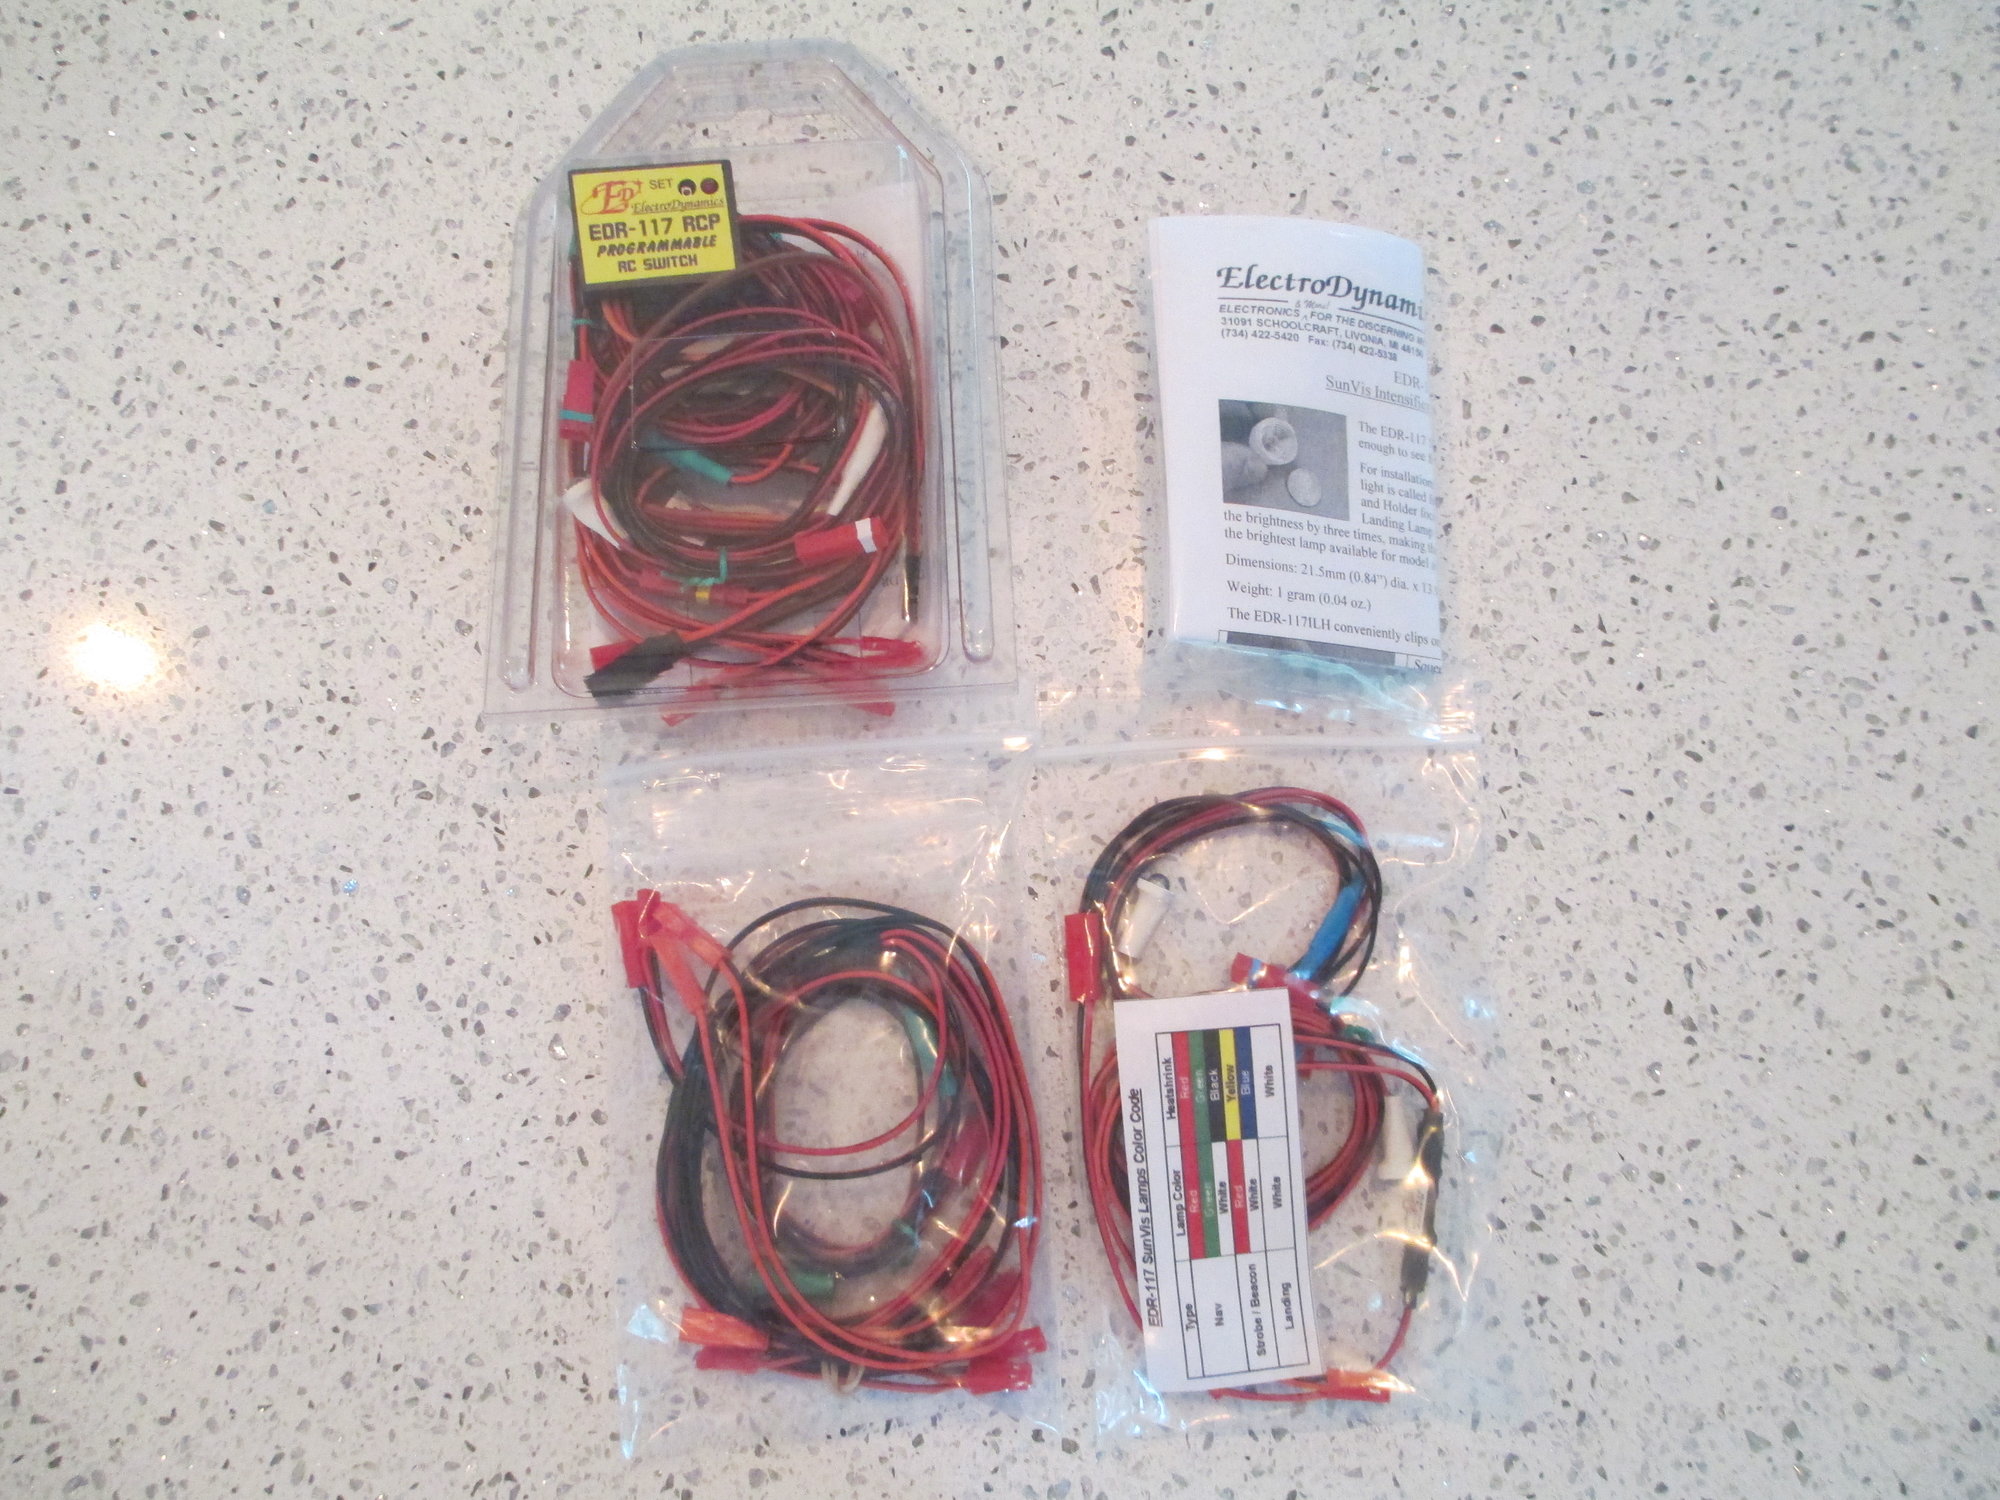
Navigational Lights red and white LED's as well as white strobes on each wing tip, plus red beacon strobe, plus white tail cone LED, as well as white landing light. Add a few extensions to boot and it will set you back about $238.00.
Last edited by VincentJ; 07-17-2019 at 11:28 PM.
07-17-2019, 01:51 PM
#112
Member

 Unless they included a control board that's just wire and LEDs. Go get your digikey book and start ordering components for much less!!
07-17-2019, 03:26 PM
Unless they included a control board that's just wire and LEDs. Go get your digikey book and start ordering components for much less!!
07-17-2019, 03:26 PM
#113
Thread Starter
Steve that does include a programmable r/c switch. It's expensive, no doubt but very nice quality... Nothing about this build will be inexpensive I'm afraid.
Last edited by VincentJ; 07-17-2019 at 03:30 PM.
 07-17-2019, 11:08 PM
#115
Thread Starter
07-17-2019, 11:23 PM
#116
Thread Starter
As I mentioned, we purchased our navigational light set-up for this project from Electro Dynamics. After I opened the box and sorted through all the wires, I realized that I was sent a green LED instead of a white LED for the tail cone by accident. I immediately called and was surprised that my phone called was answered right away and the problem was rectified. Thank you Chris at Electro Dynamics for such great service. He even followed up with an email apologizing for the confusion and sent me this schematic to help sort though the maze of wires. Great company to do business with great service, the way it should be!
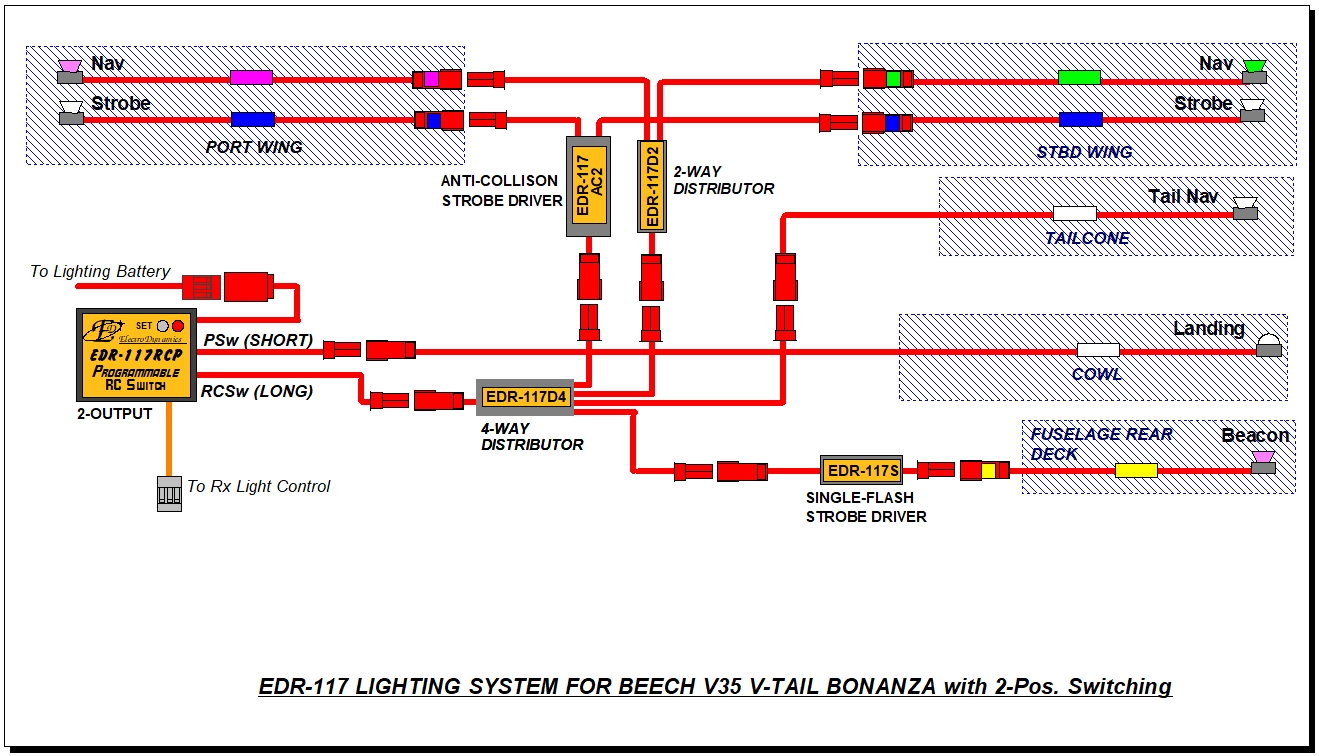
This is the schematic that I'll be using on our project. Thought it may help .
This is the schematic that I'll be using on our project. Thought it may help .
07-18-2019, 05:56 AM
#117


I like your nonna's saying, Vincent. Though I am far from wealthy, I try to get the best that I can afford. Sometimes, I can�t. For the expensive stuff, when resale comes along, I get more money back. The savings that nonna is talking about. I have accepted that �expensive� is part of this fun hobby.
Before our last club fun fly, I had never seen navigational lights on a model. The lights added a high degree of realism on the ground and in the air. I could see where they would help in orientation of a �sky-colored� plane in the bright Texas sun.
It will be interesting to see how you route the wiring. I will want to see how you cut/formed the holes, too.
07-18-2019, 08:11 AM
#118
Thread Starter
Ask and you shall receive Lupe...
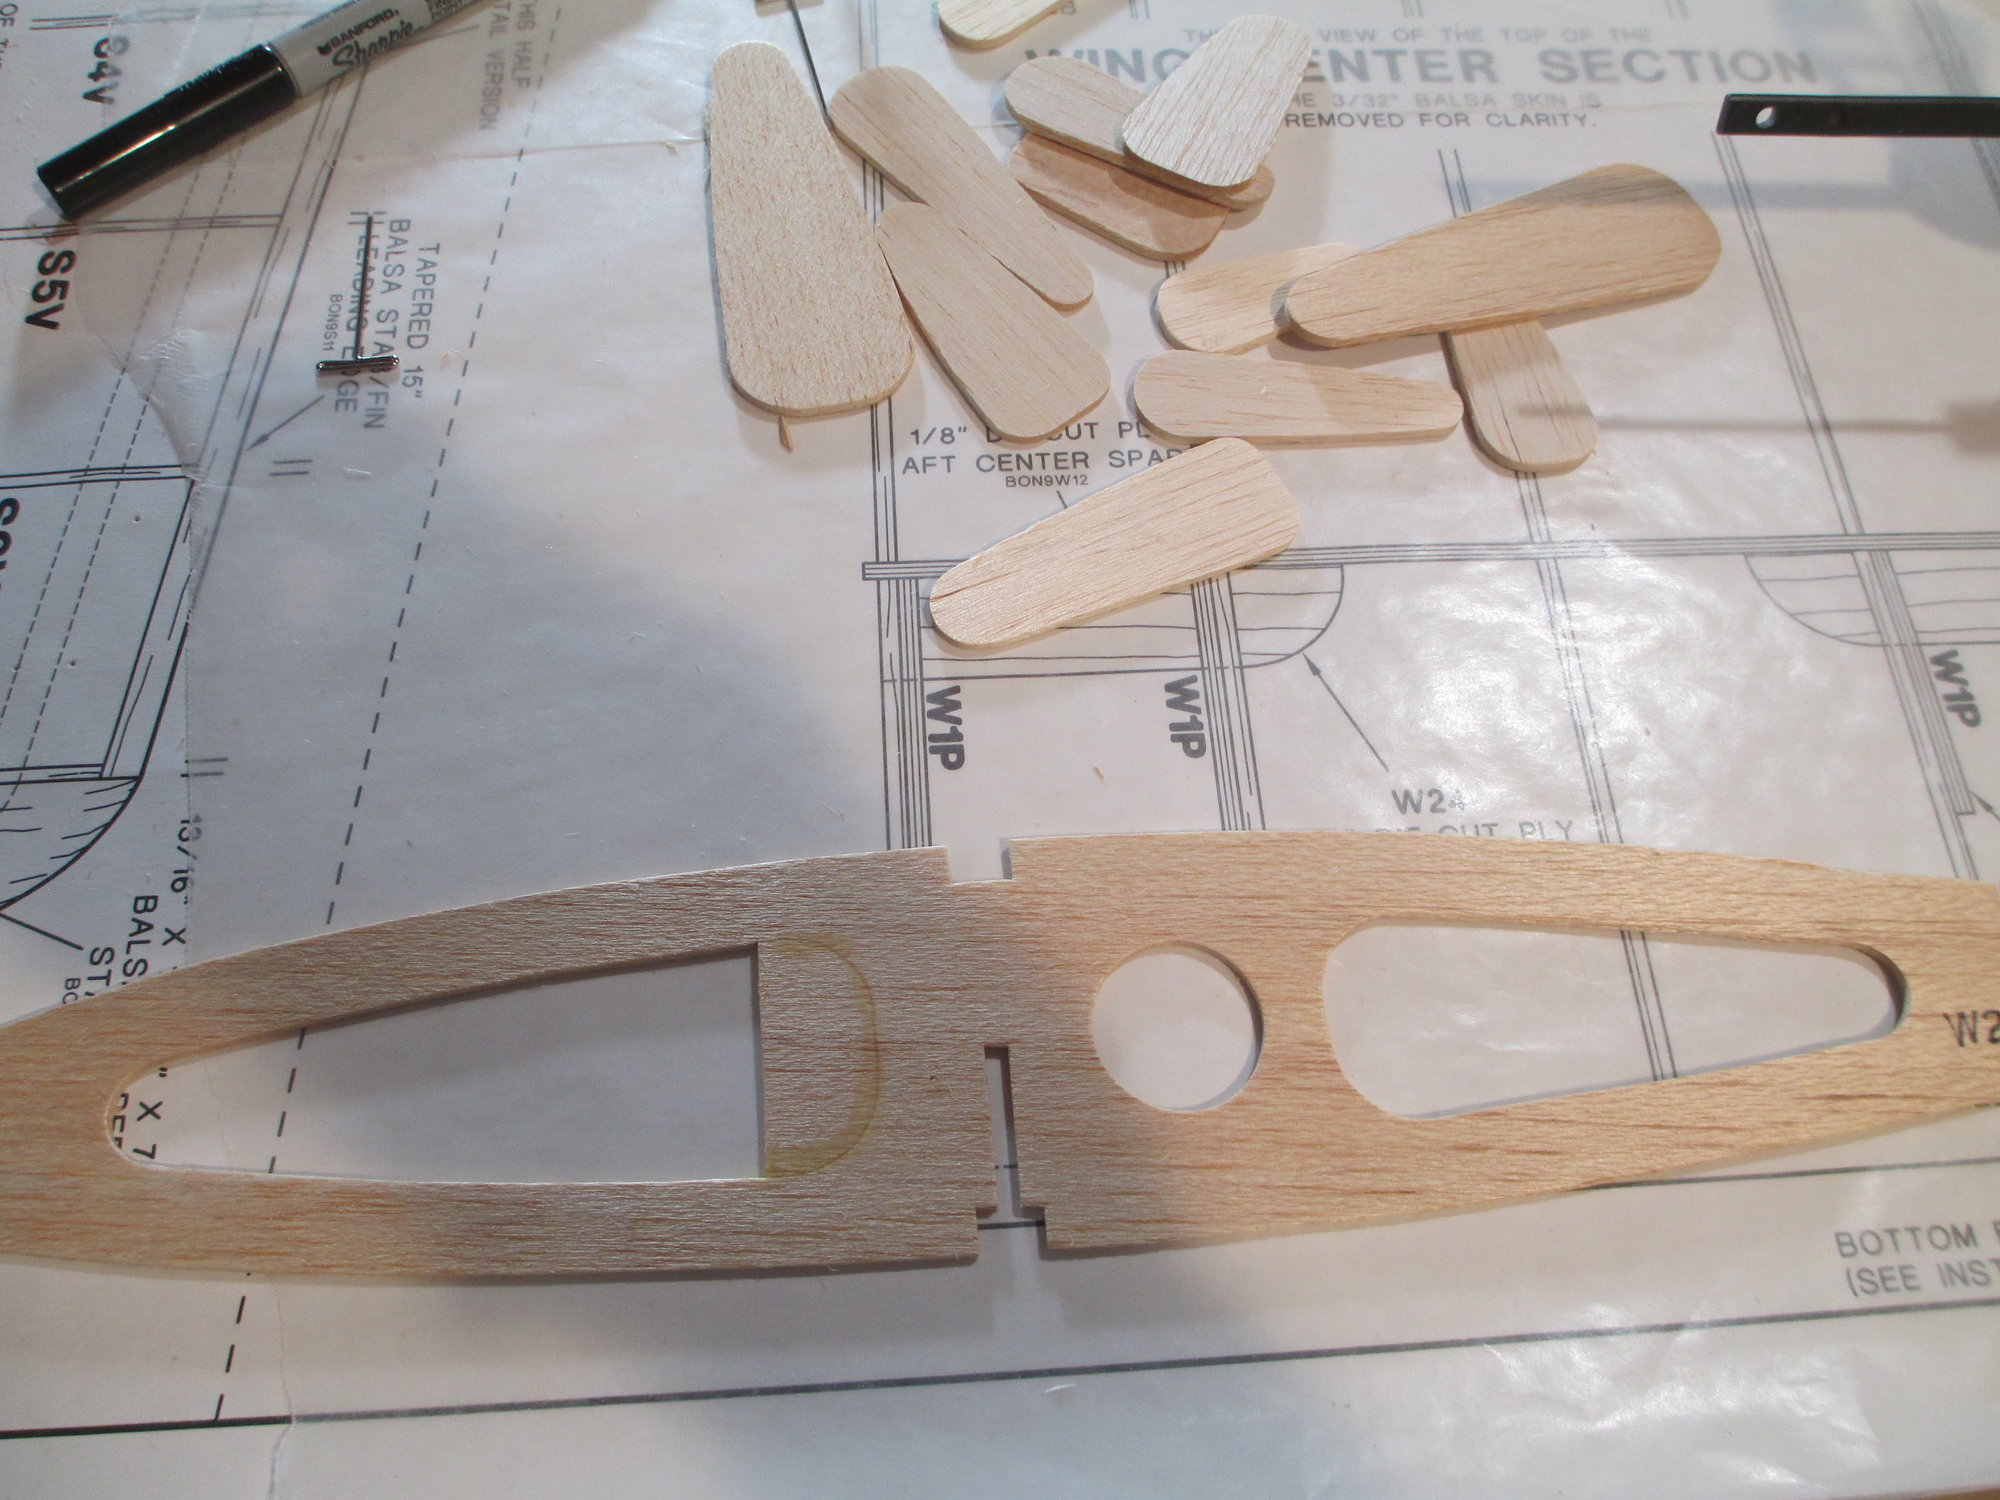
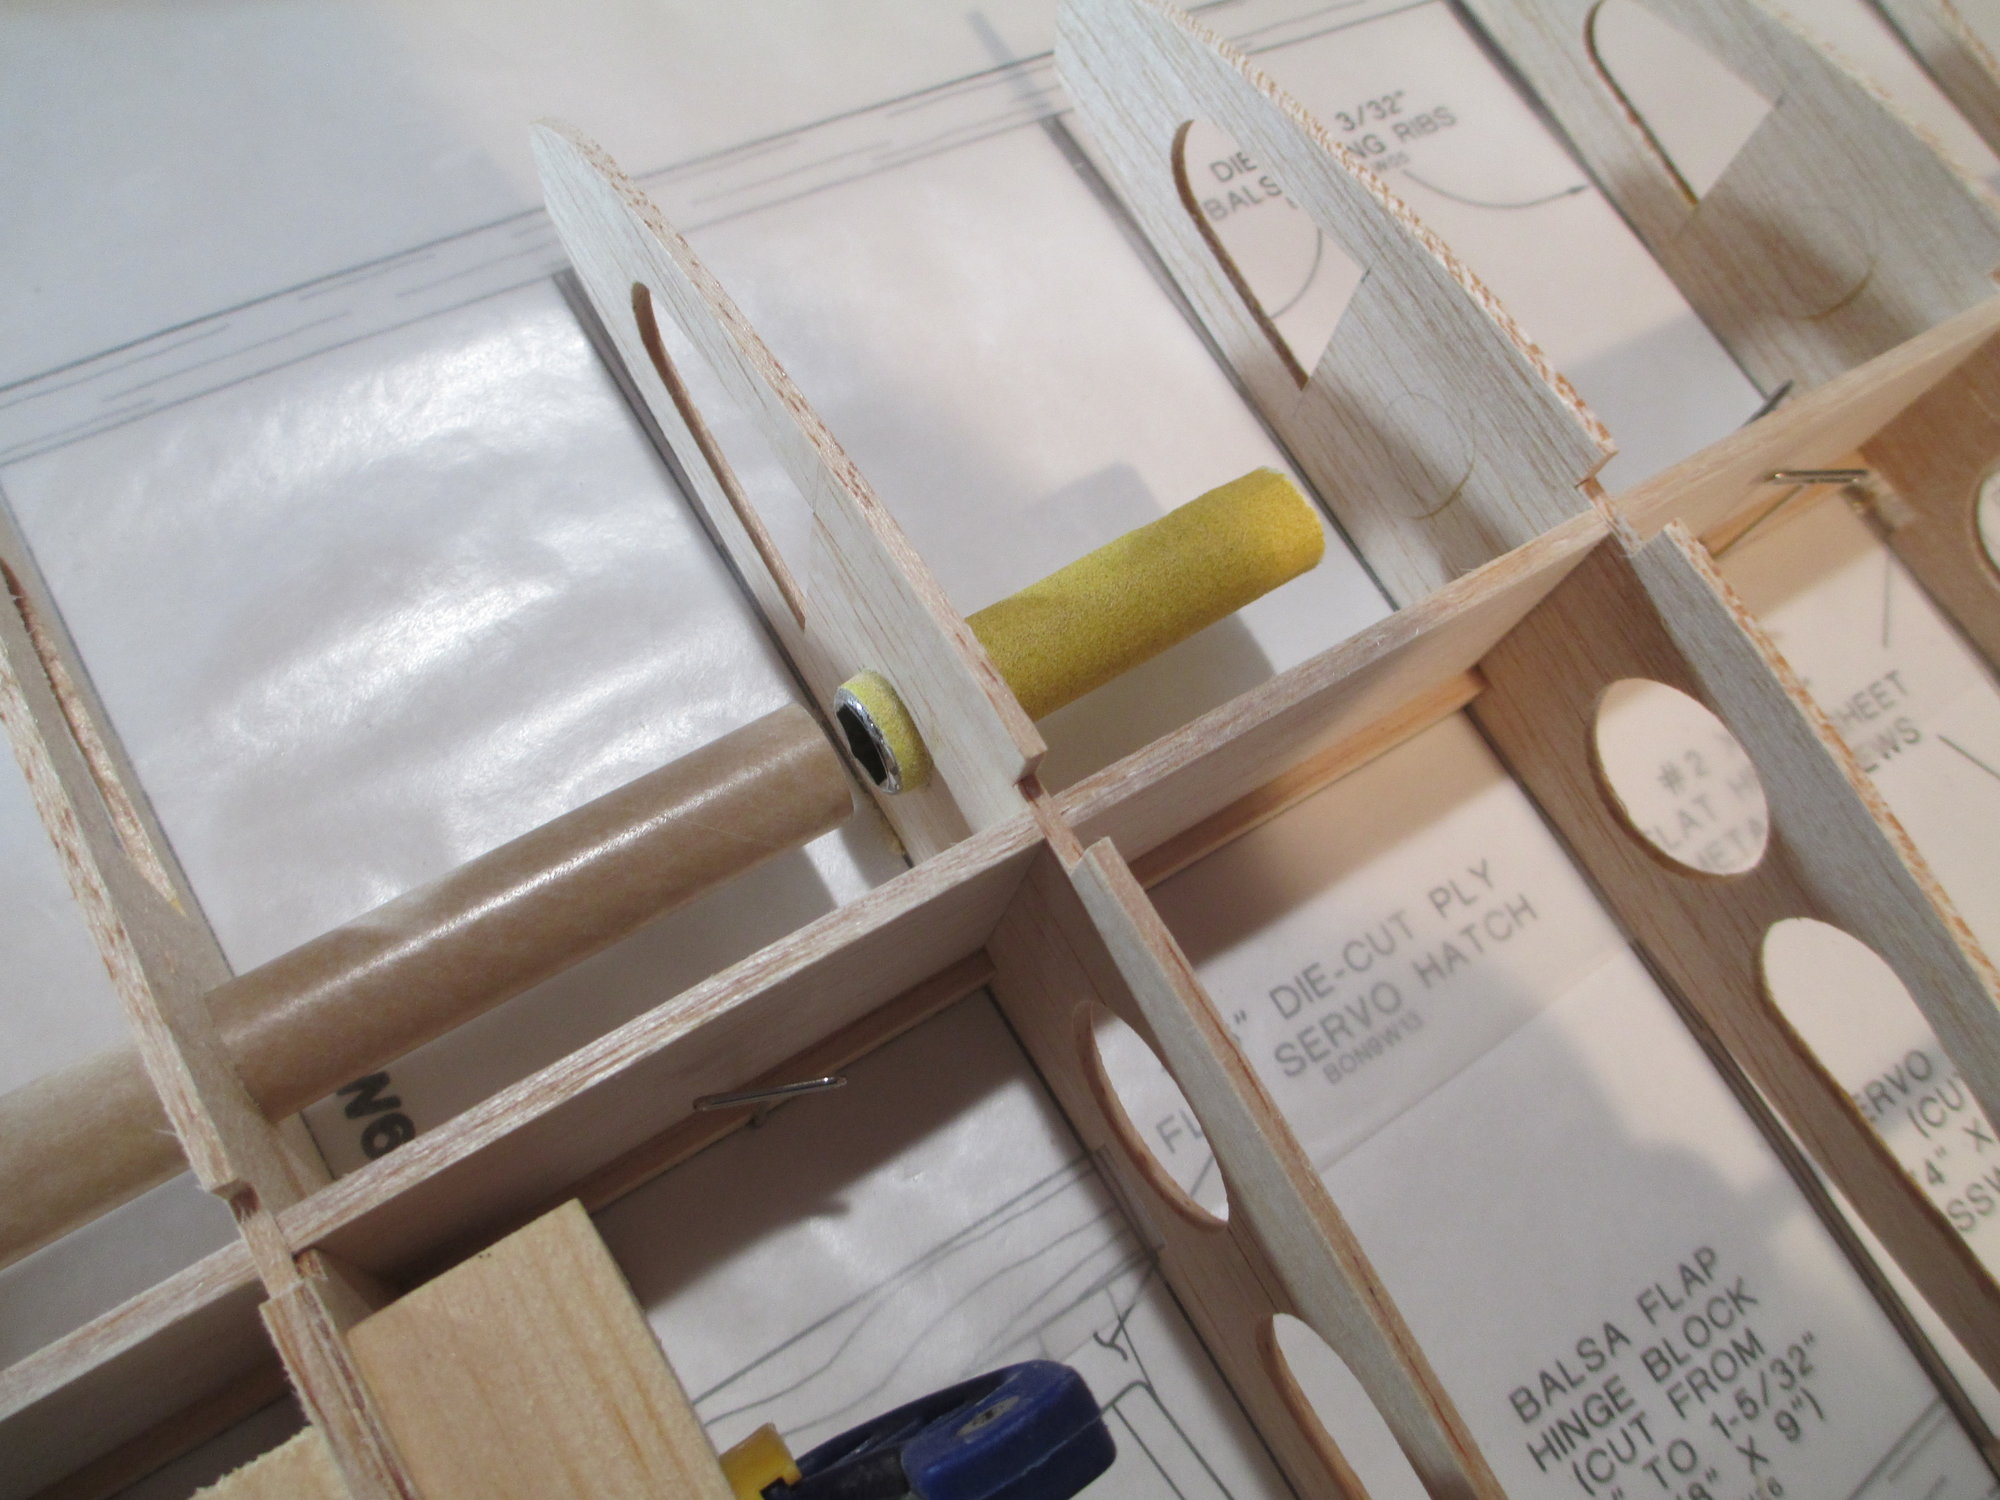
Not wanting to weaken the ribs by drilling holes for the navigational lights, I decided to glue part of the die cut plugs back in place towards the forward portion of each rib as shown.
A hole was drilled in each portion of the plug that will accept a 1/2" Estes rocket tube. This will provide a chase for the wires to slip through without weakening any of the ribs.
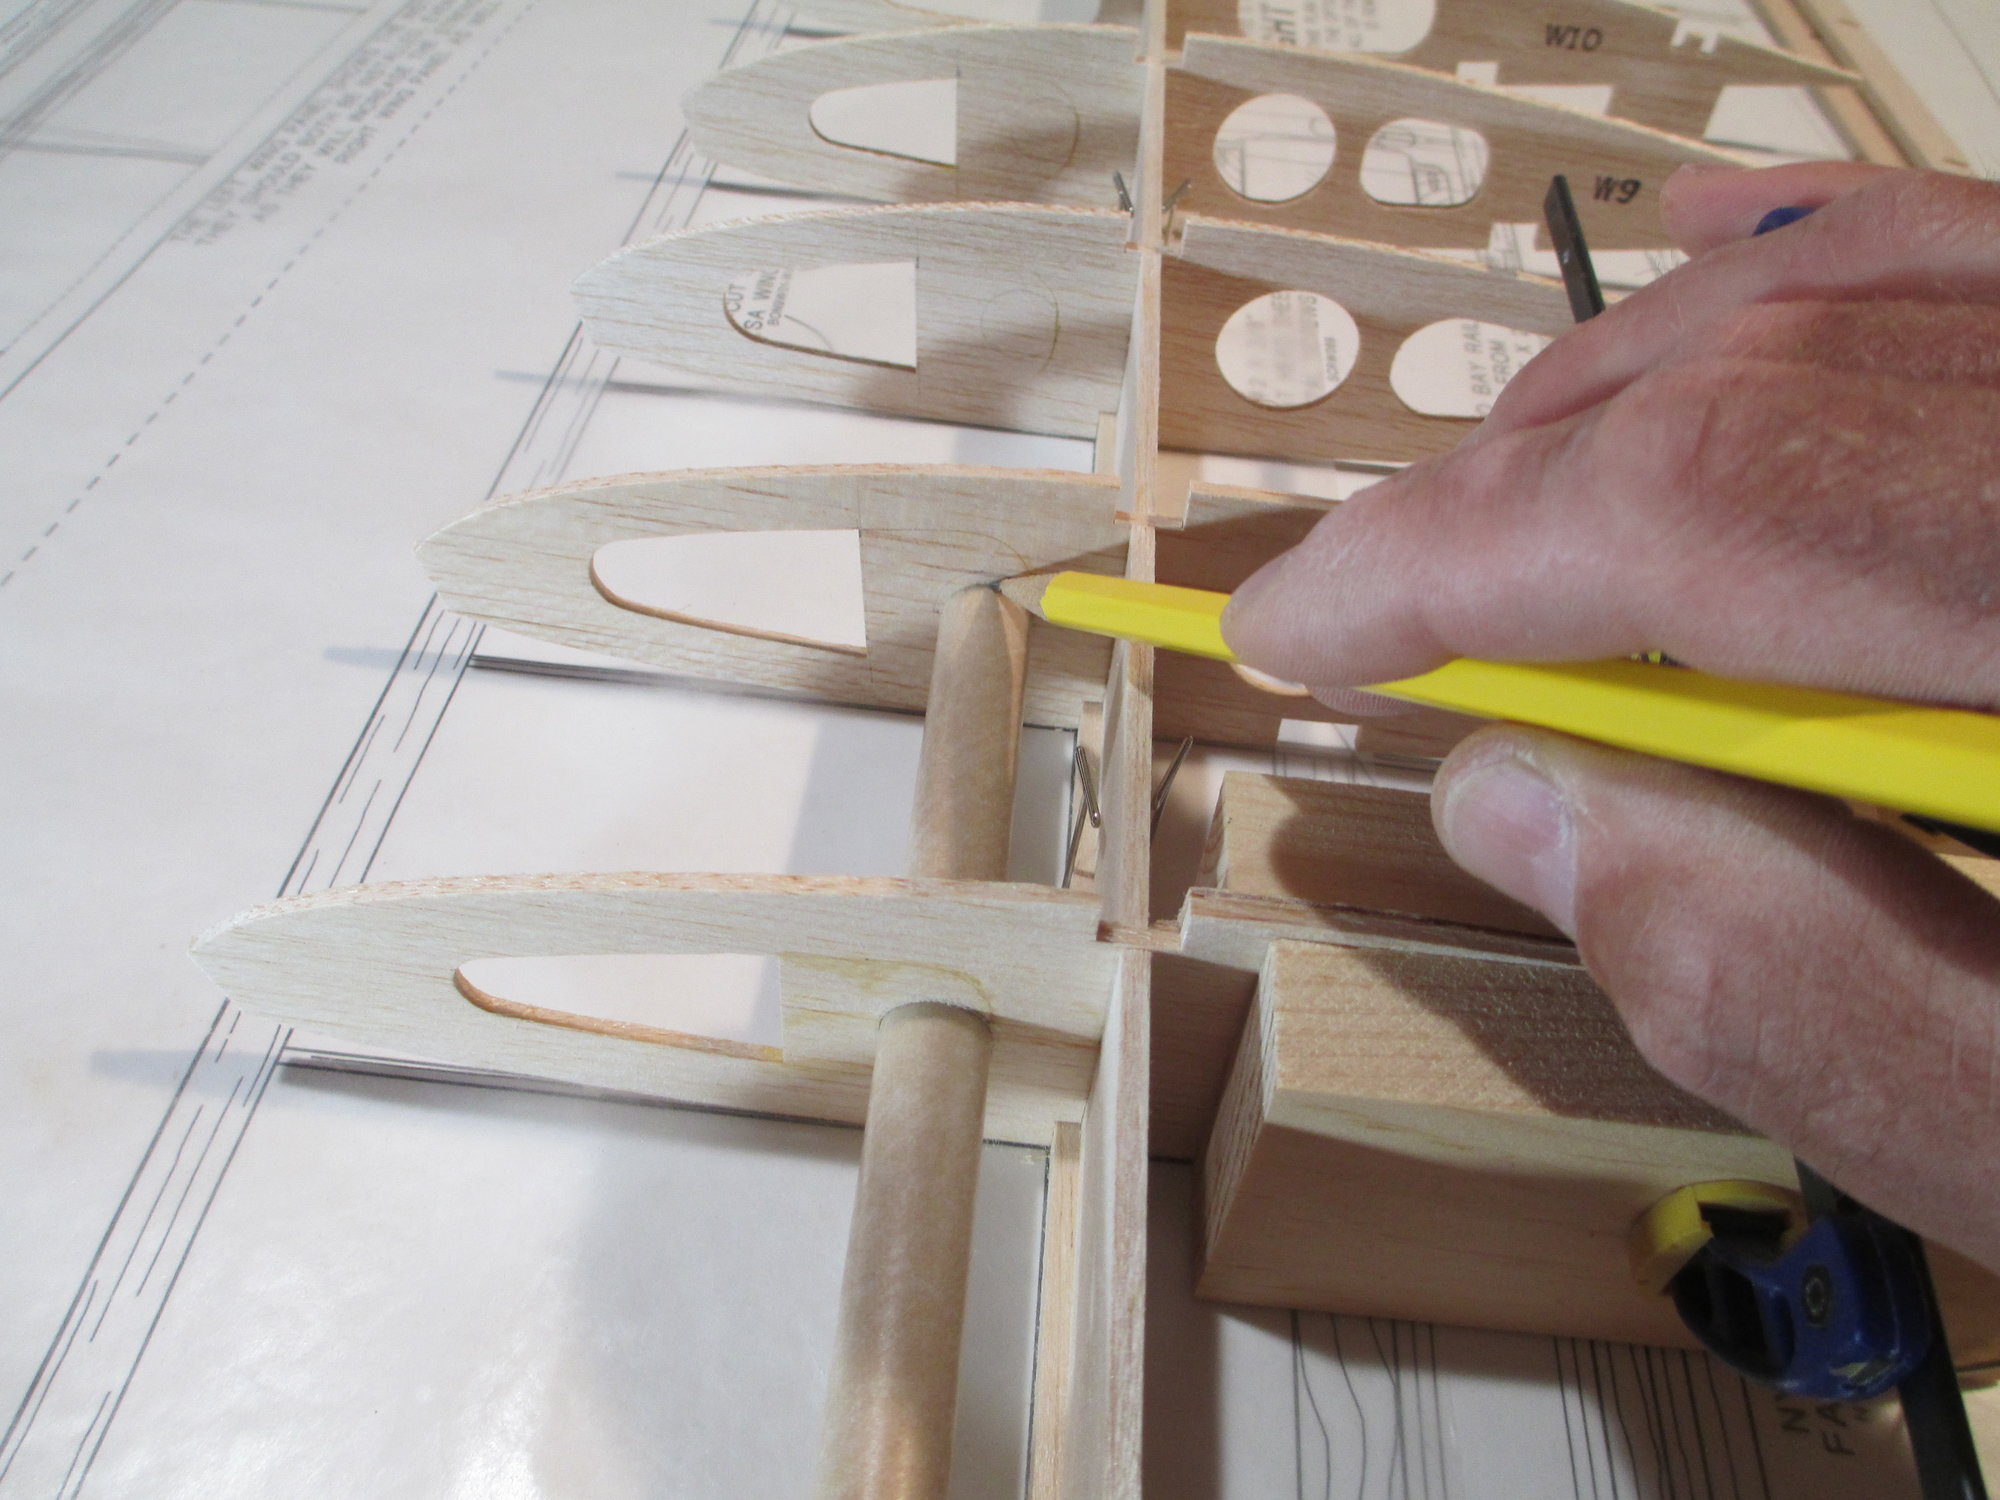
I didn't want to drill the holes oversize. The rocket tube fits snug in each opening giving additional strength to the wing panel once epoxied in place. The tube is slid forward to the next rib in place and I simply draw an outline of the tube on the rib.
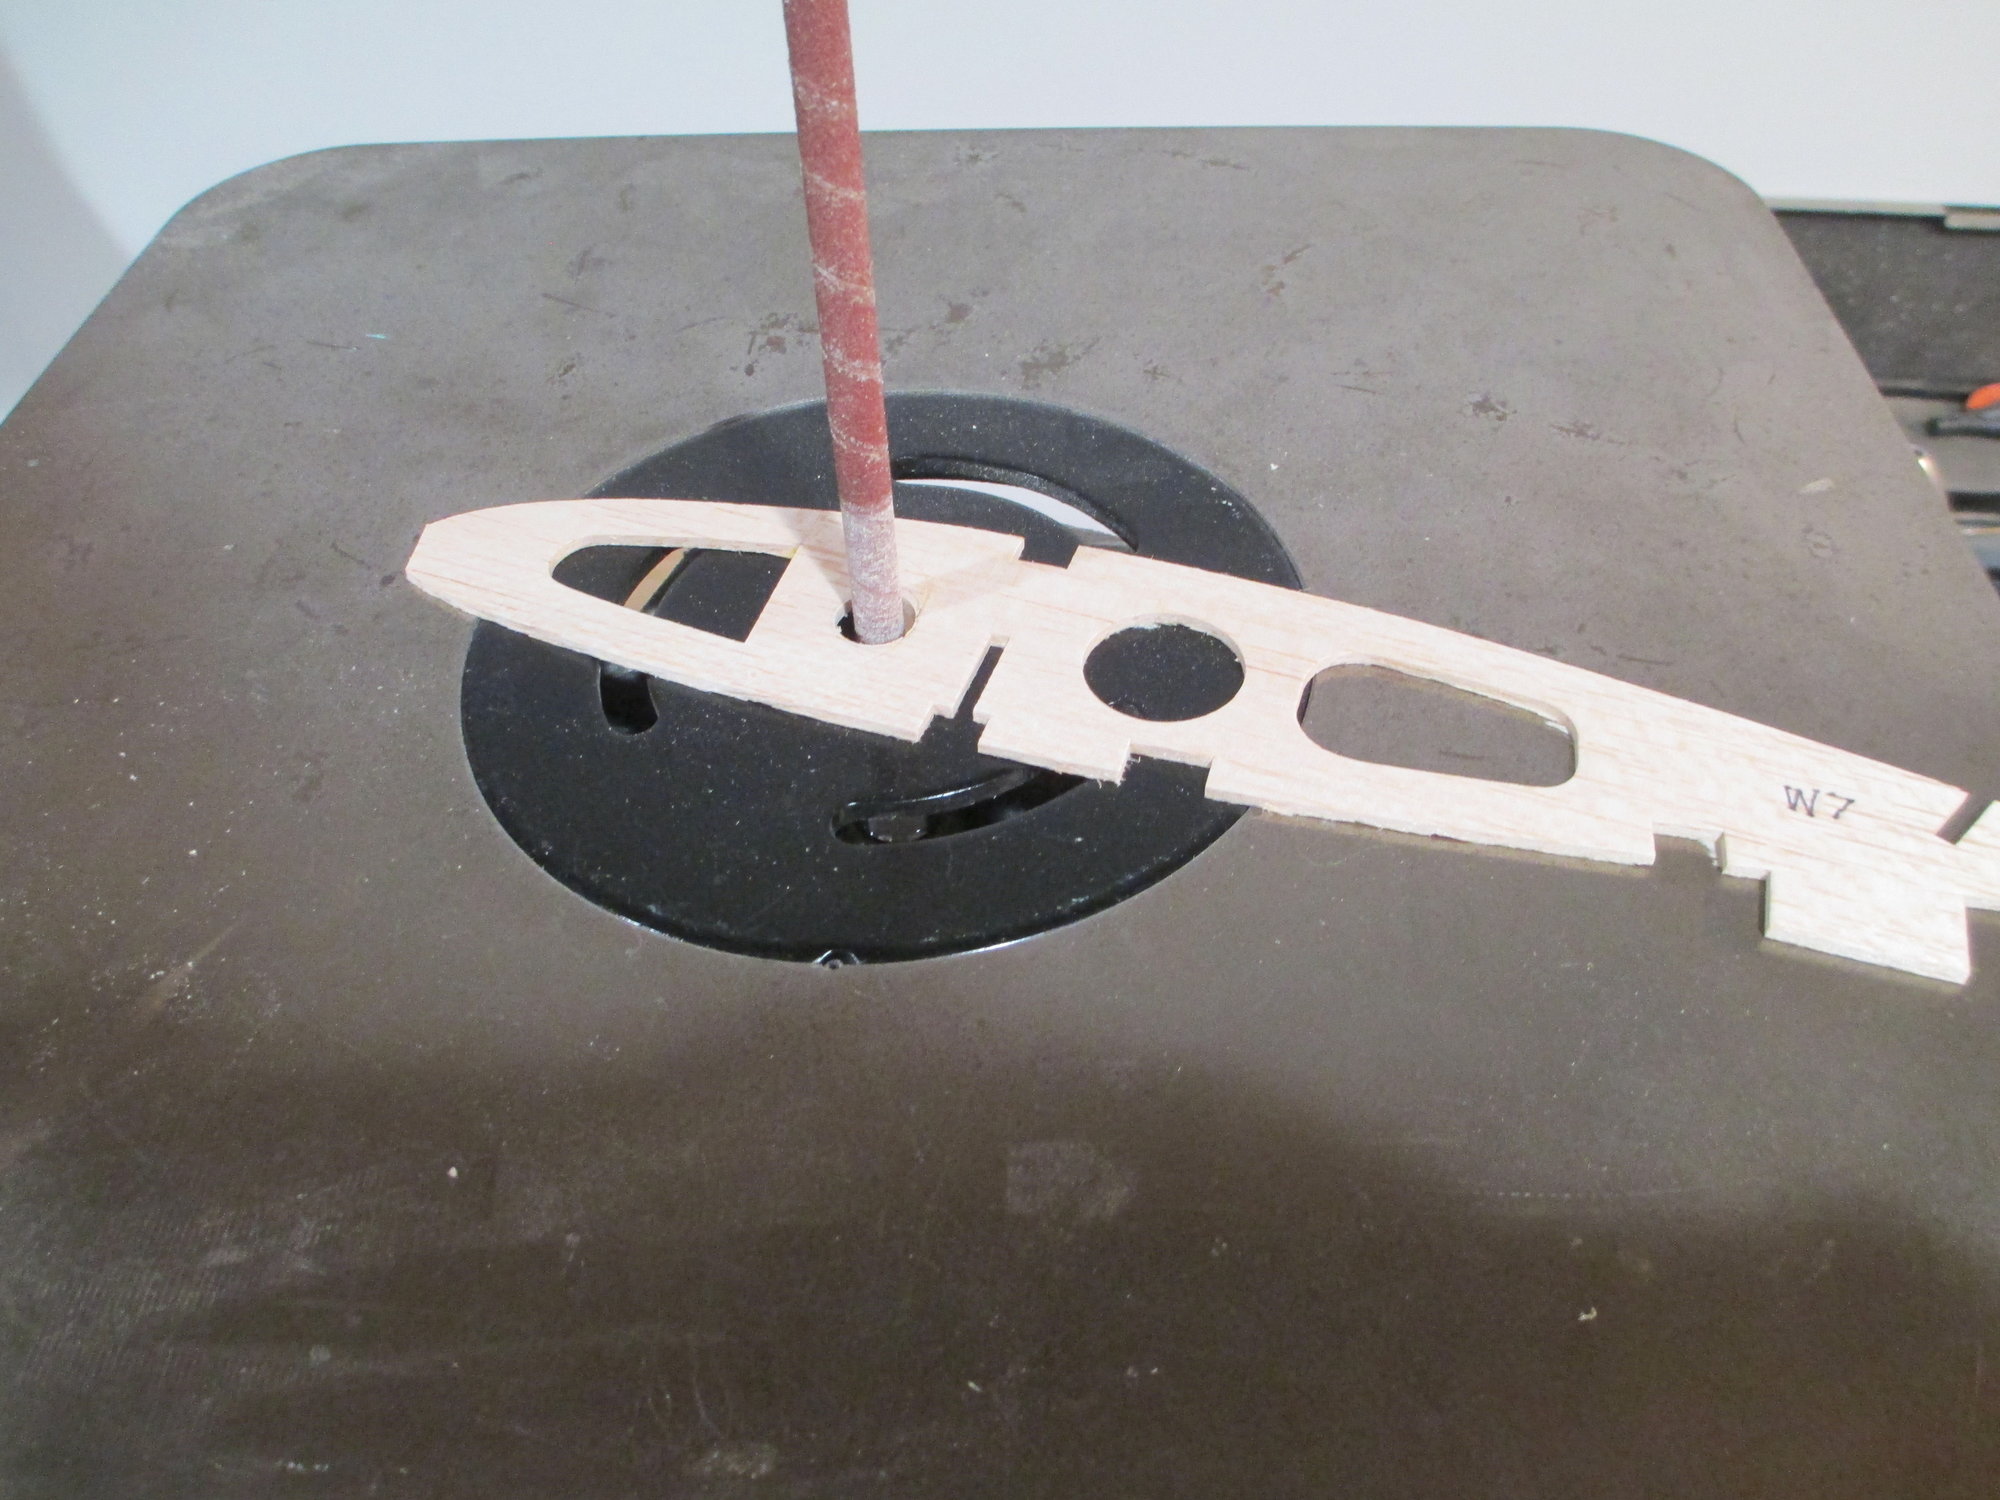
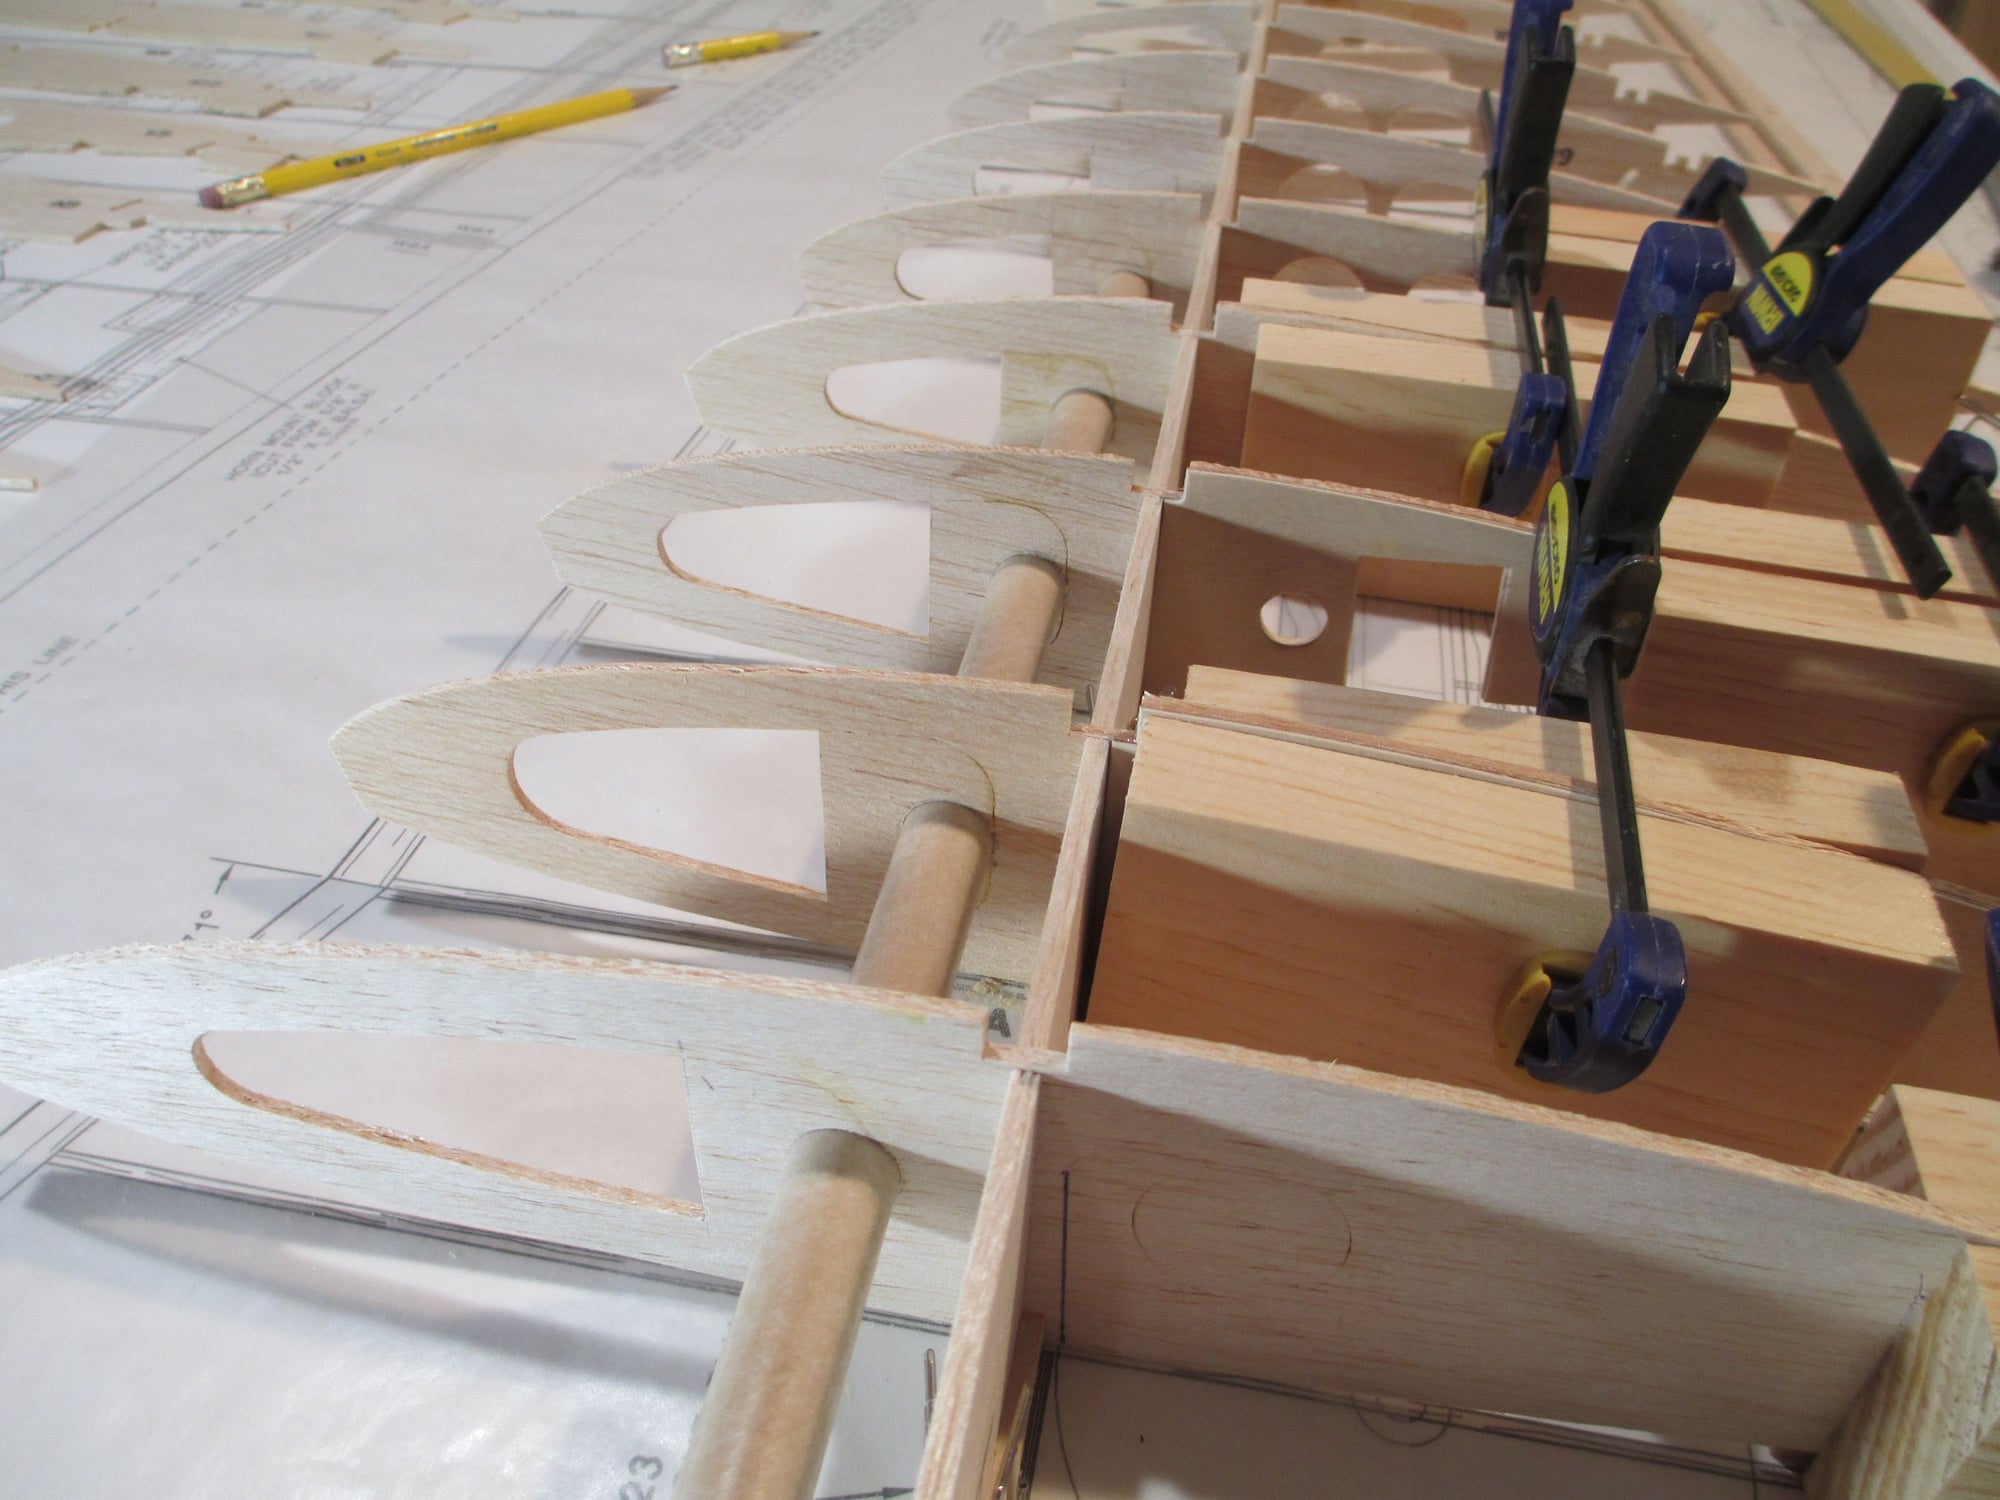
The rib is removed and placed on my oscillating spindle sander where I get it pretty close to the pencil line.
The rib is re-installed and using deep socket wrapped with 150 grit sandpaper, I get the fit I'm looking for.
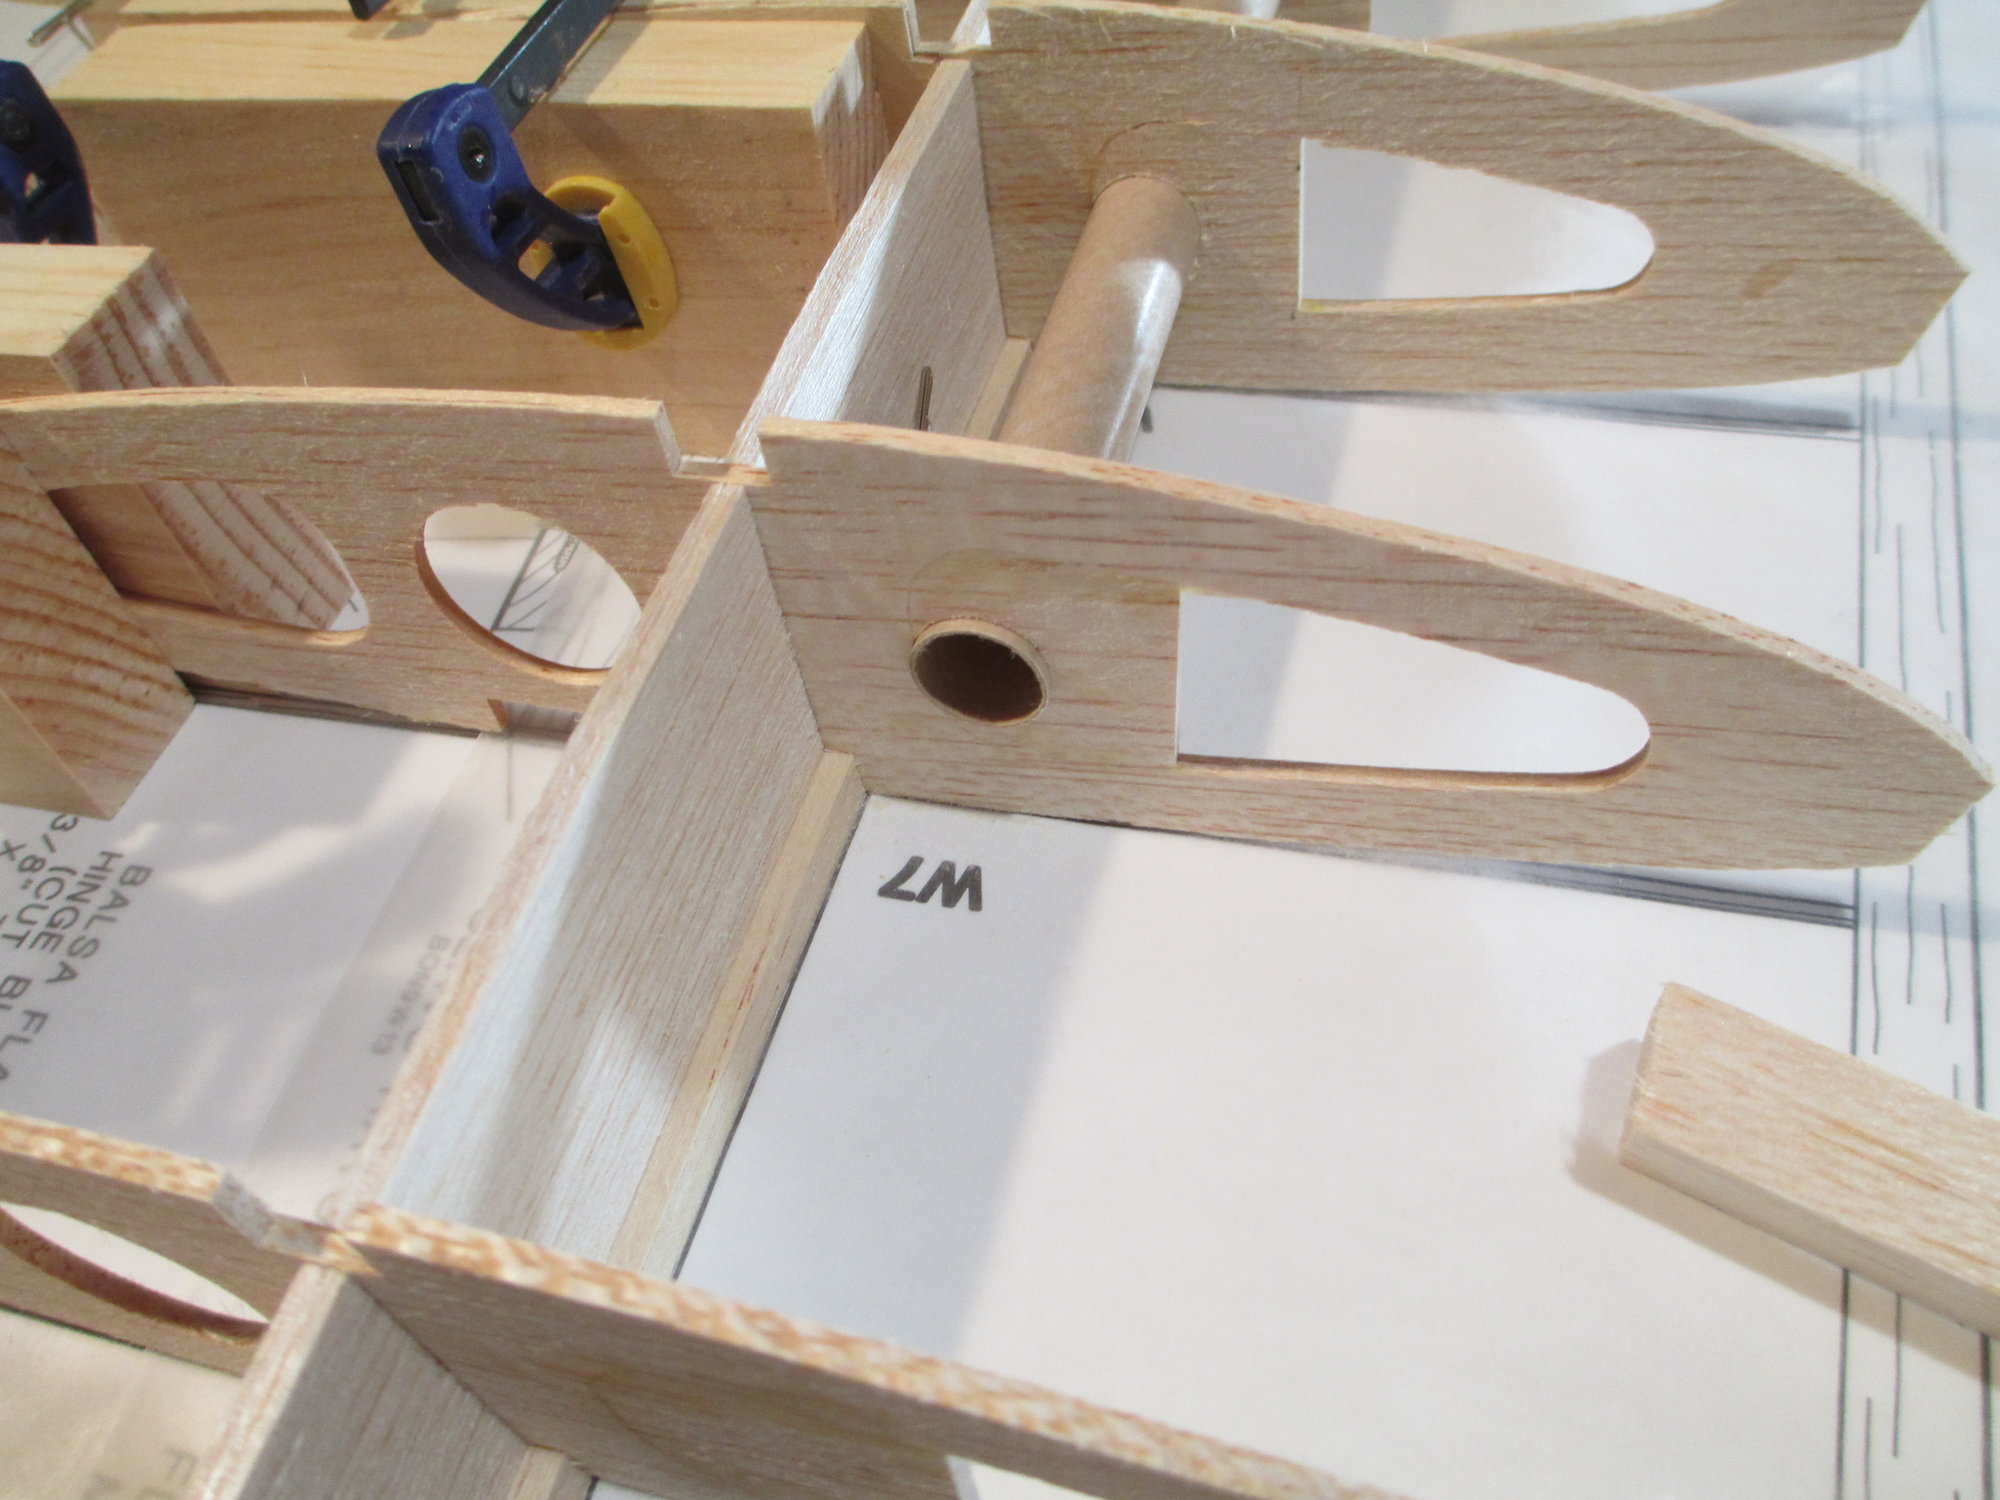
The end result is a nice opening without any slop.
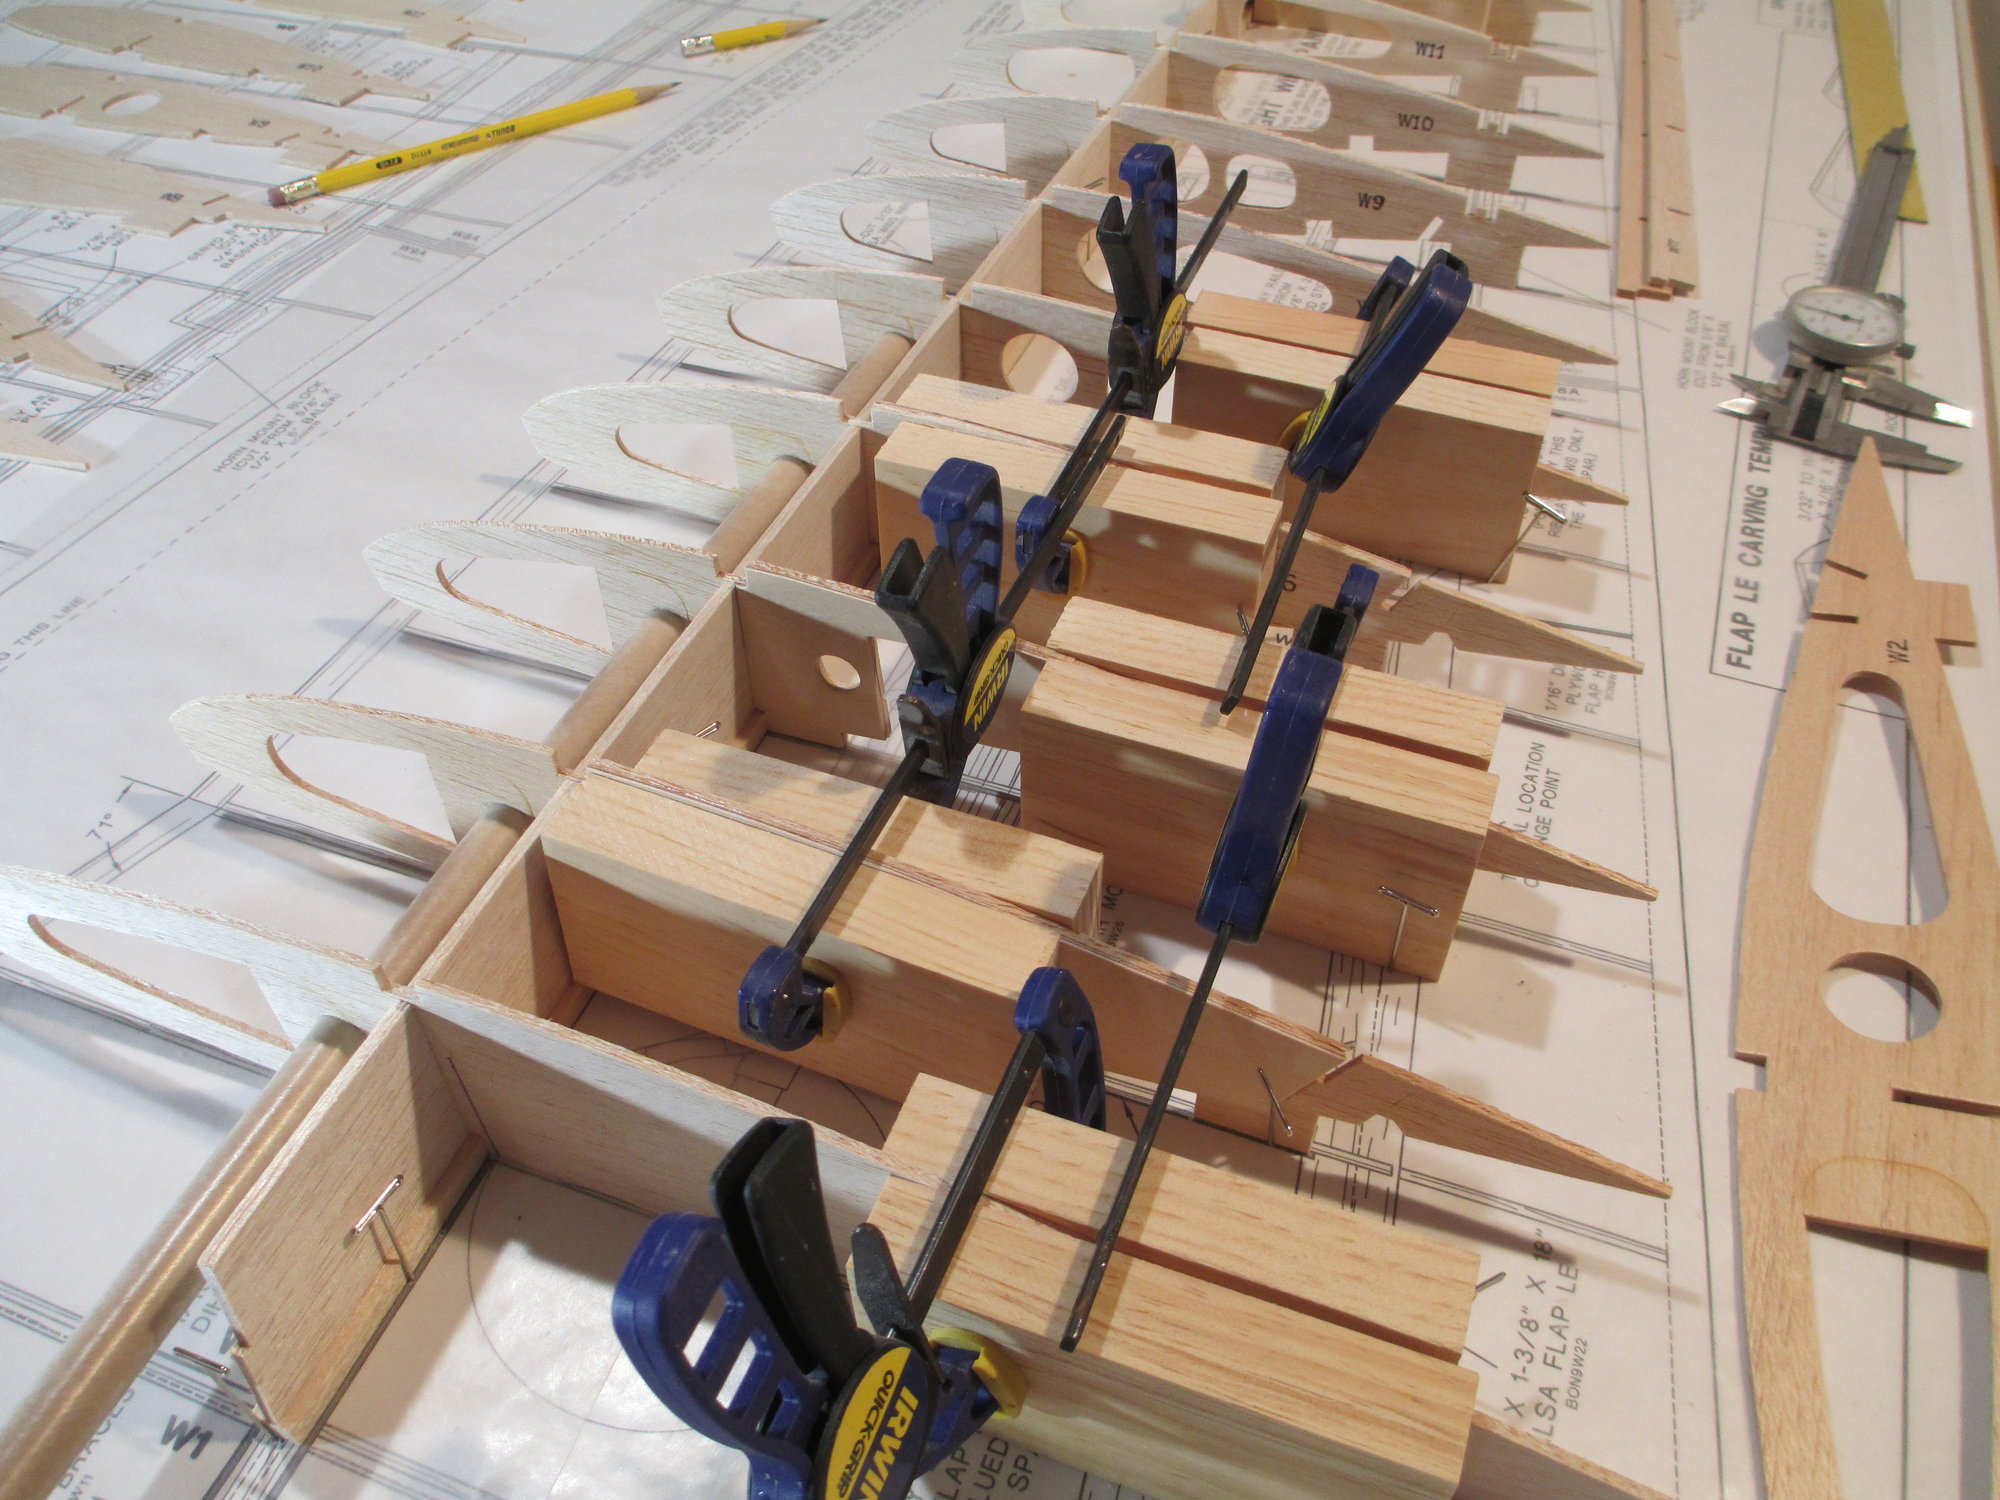
Each rib is held in place by placing these simple rectangle pine blocks that I made on each side of the rib with a clamp. I made sure when cutting these blocks that each is perfectly square.

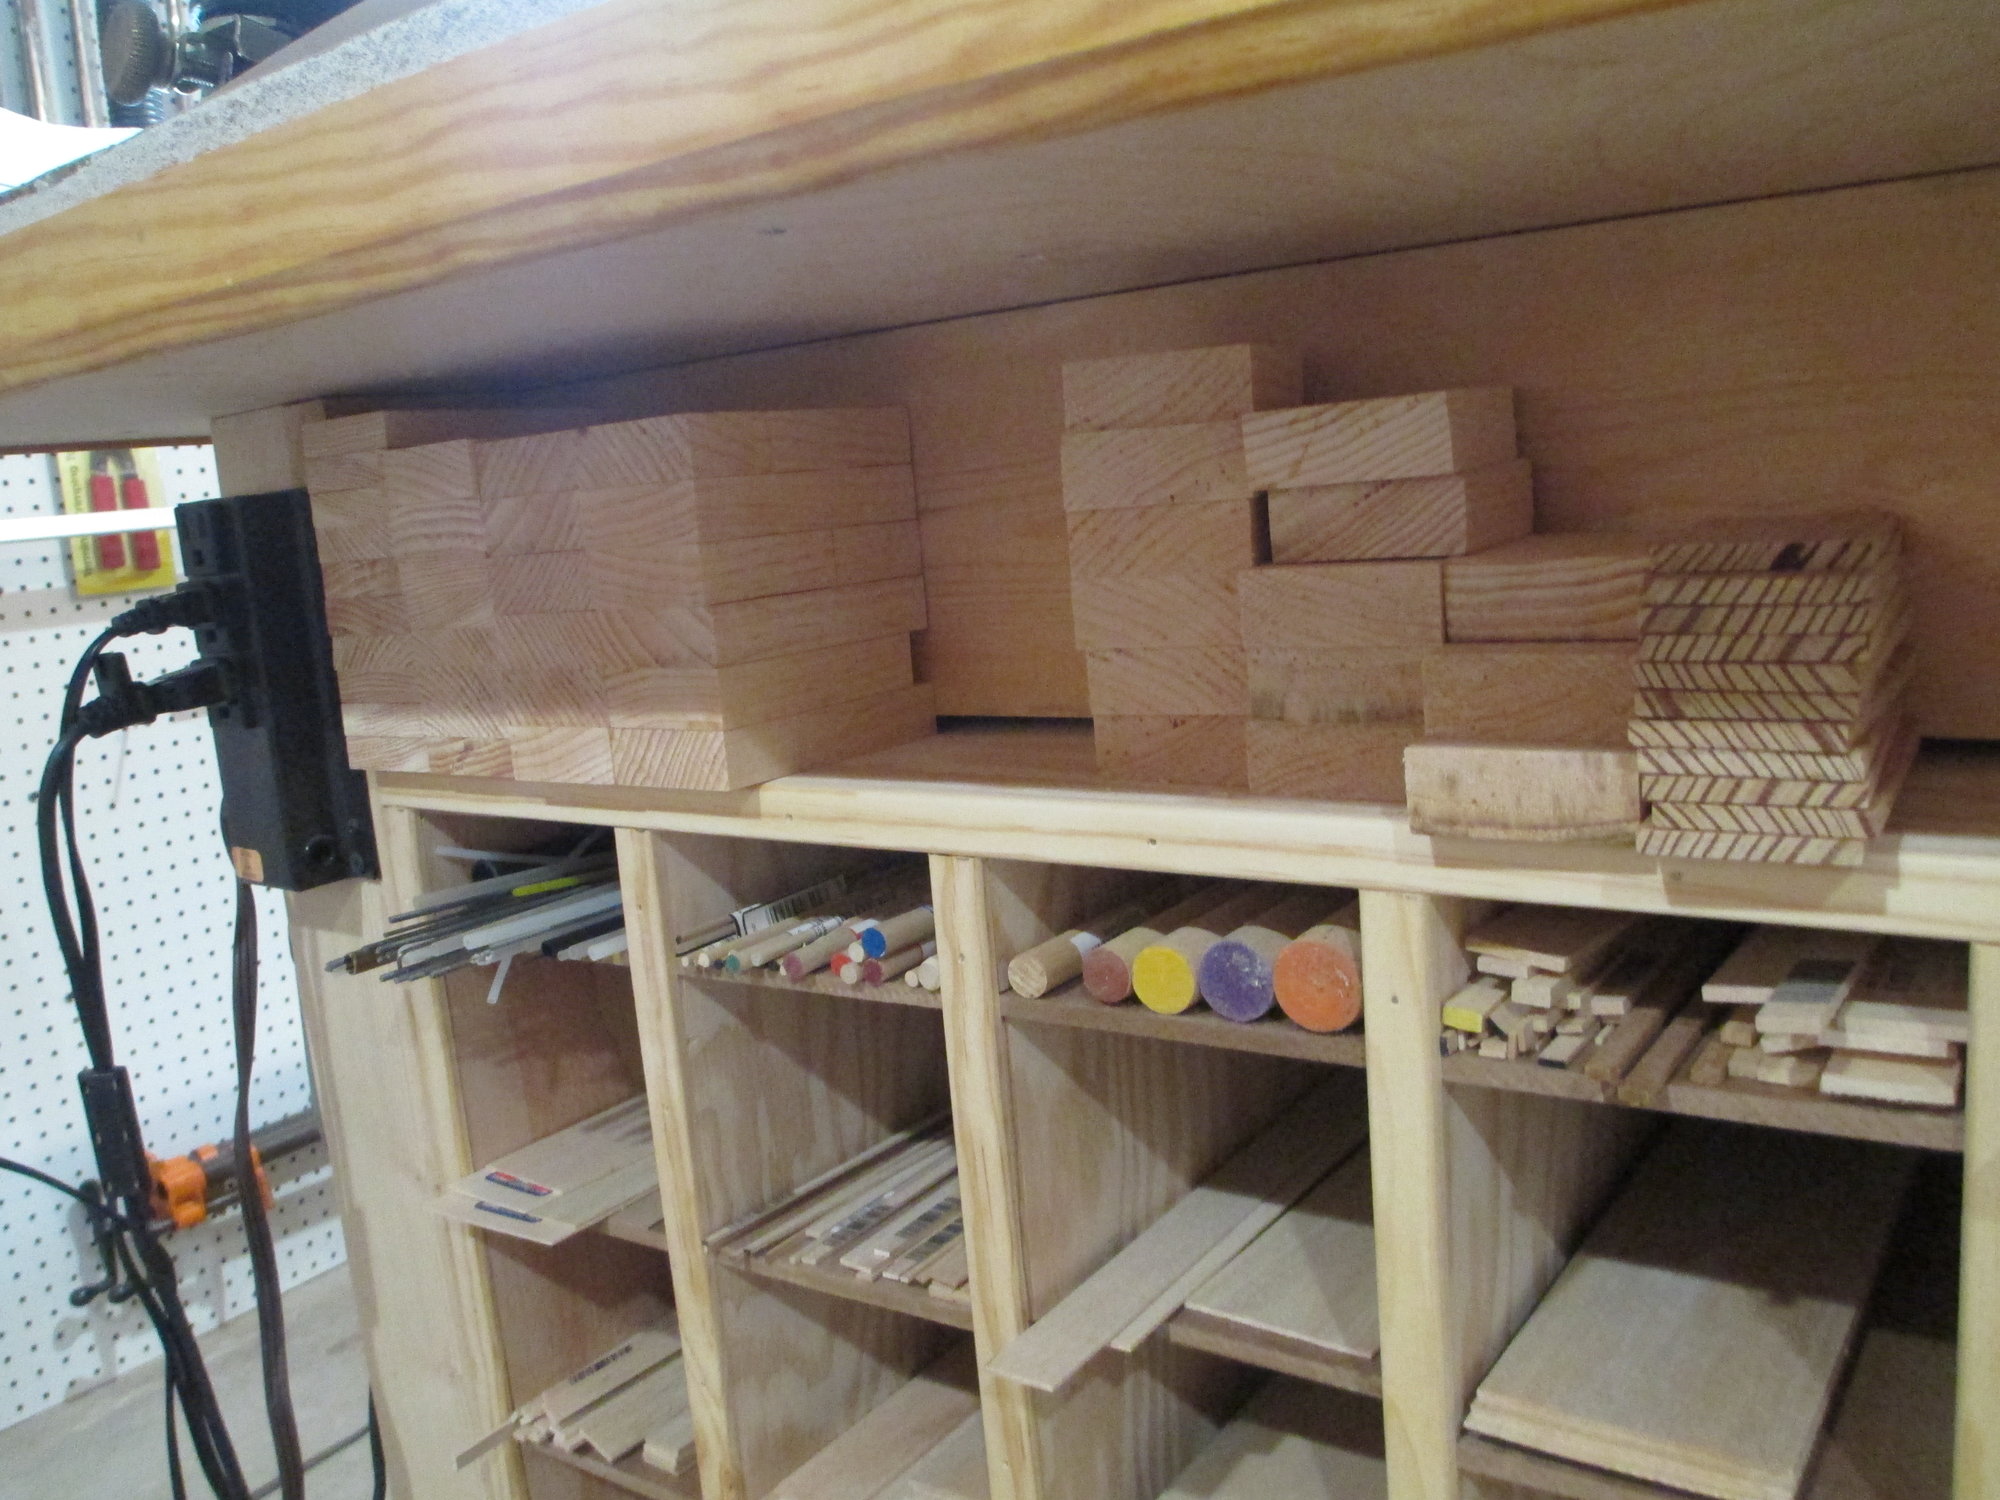
Here's where I keep my stash of those blocks...
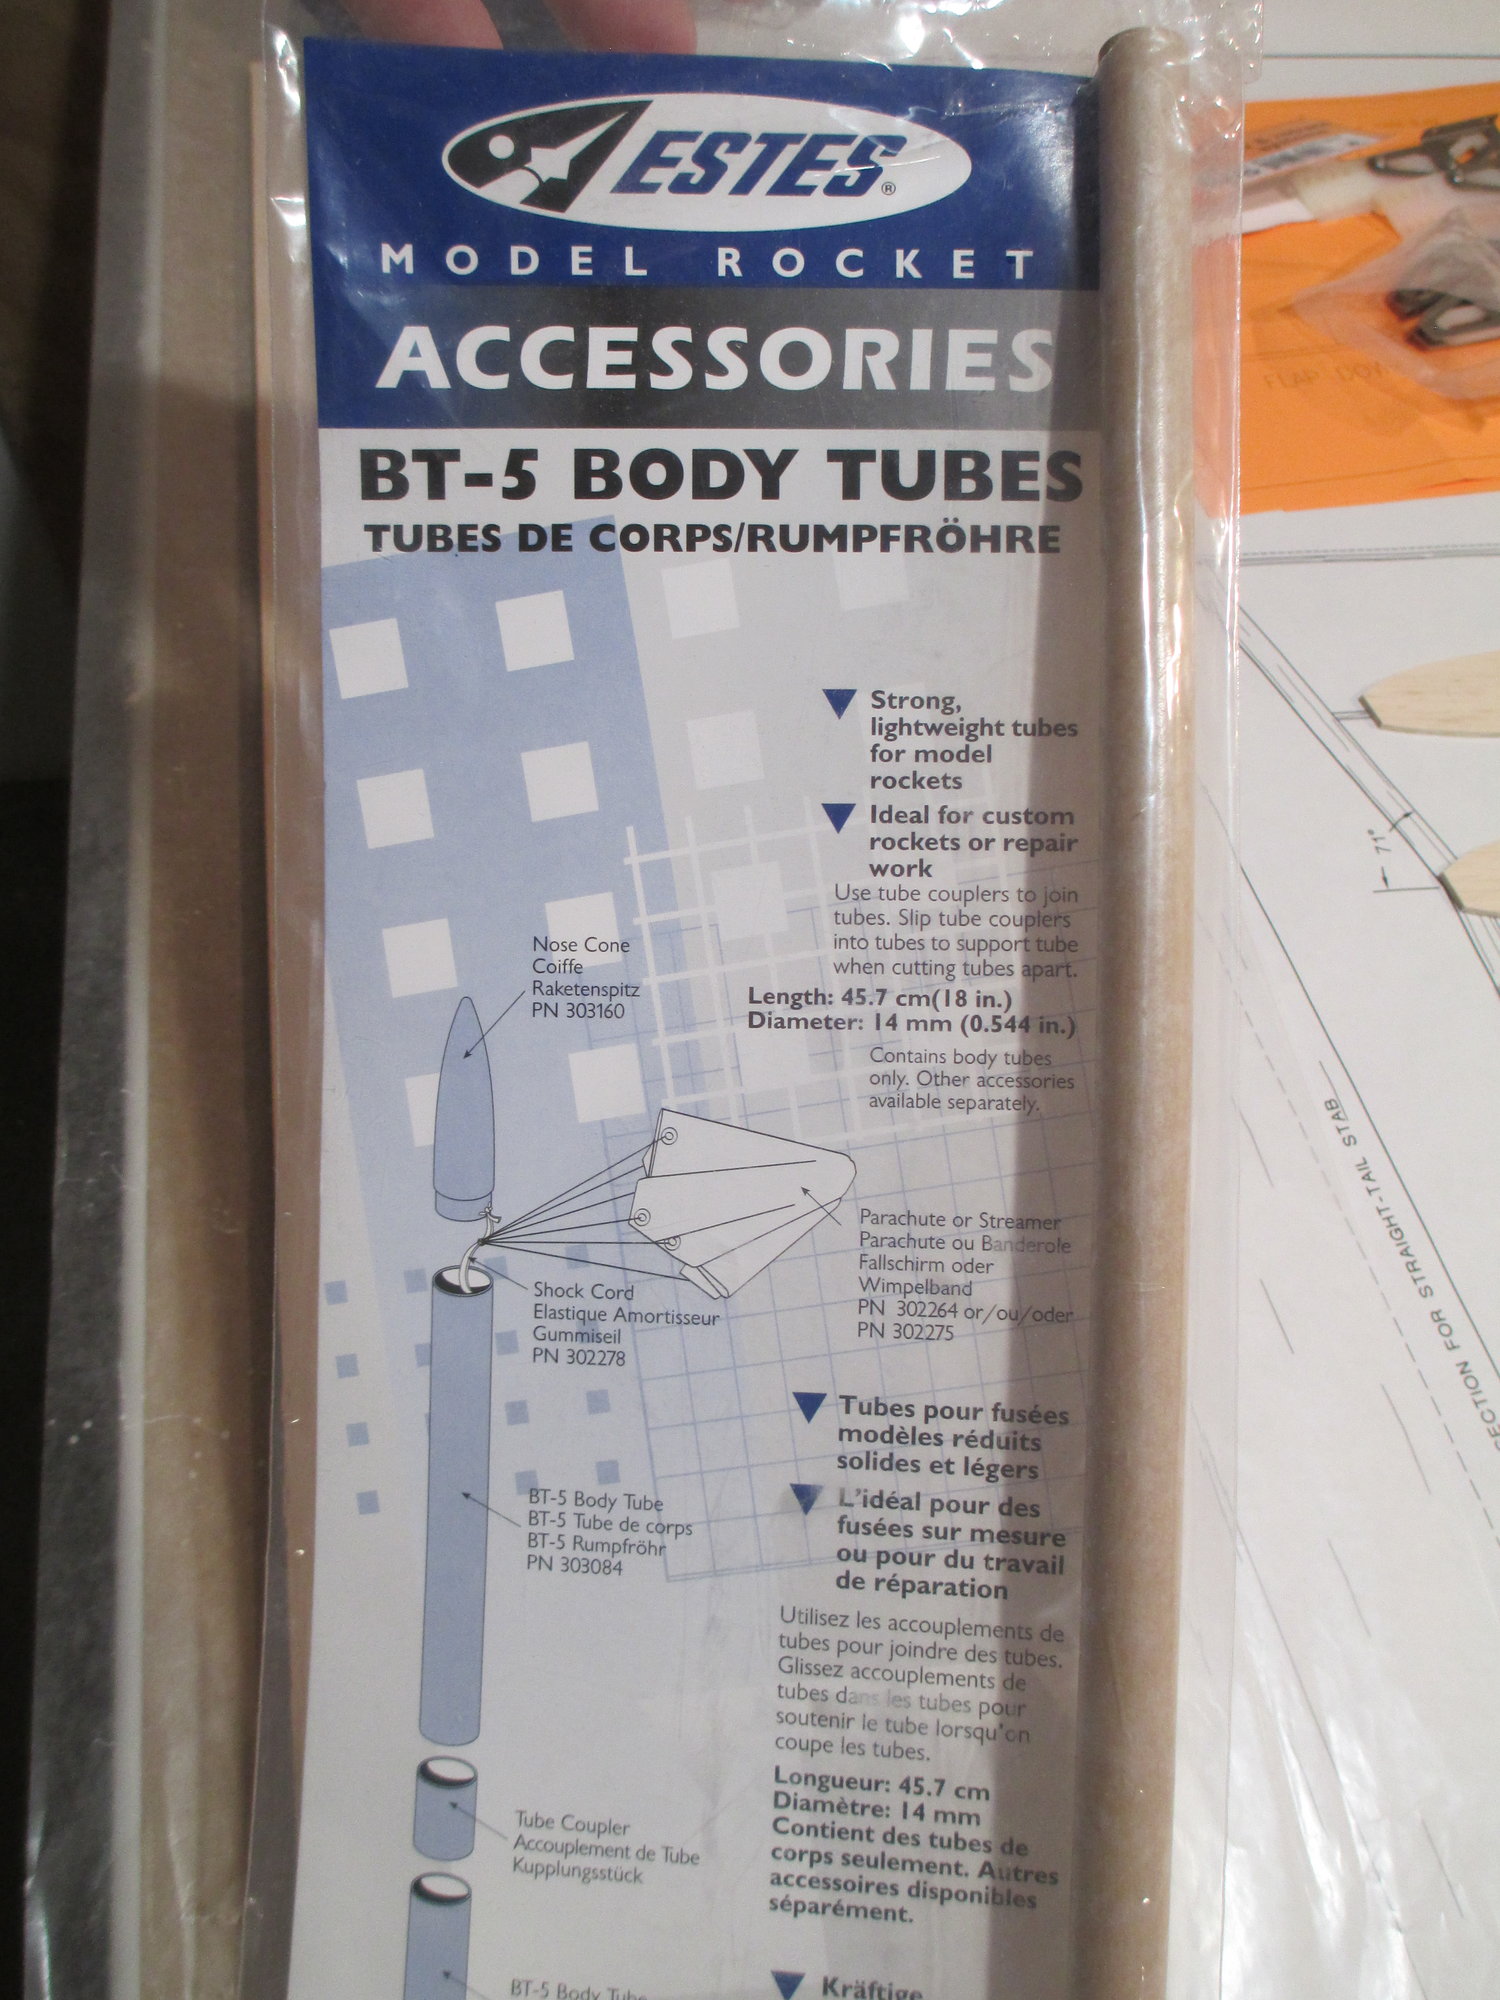
These rocket tubes come in a variety of diameters. I'm using the smallest diameter tubes which have an outside diameter of .544 in. They are light and will give strength to each wing panel.
Not wanting to weaken the ribs by drilling holes for the navigational lights, I decided to glue part of the die cut plugs back in place towards the forward portion of each rib as shown.
A hole was drilled in each portion of the plug that will accept a 1/2" Estes rocket tube. This will provide a chase for the wires to slip through without weakening any of the ribs.
I didn't want to drill the holes oversize. The rocket tube fits snug in each opening giving additional strength to the wing panel once epoxied in place. The tube is slid forward to the next rib in place and I simply draw an outline of the tube on the rib.
The rib is removed and placed on my oscillating spindle sander where I get it pretty close to the pencil line.
The rib is re-installed and using deep socket wrapped with 150 grit sandpaper, I get the fit I'm looking for.
The end result is a nice opening without any slop.
Each rib is held in place by placing these simple rectangle pine blocks that I made on each side of the rib with a clamp. I made sure when cutting these blocks that each is perfectly square.
Here's where I keep my stash of those blocks...
These rocket tubes come in a variety of diameters. I'm using the smallest diameter tubes which have an outside diameter of .544 in. They are light and will give strength to each wing panel.
Last edited by VincentJ; 07-18-2019 at 08:14 AM.
07-18-2019, 08:46 AM
#119
Member
Definitely NRE built into that price because the components are nowhere near that cost. I do embedded device development at work and this would just be a fun challenge.
07-19-2019, 04:51 AM
#120
Thread Starter

All of the ribs are installed plumb (90 degrees) except for the first rib (W2) which is set at 84 degrees to accommodate the wing's dihedral.


With the rocket tube in place, a small fillet of epoxy on each side of the rib was applied to permanently secure the tube.
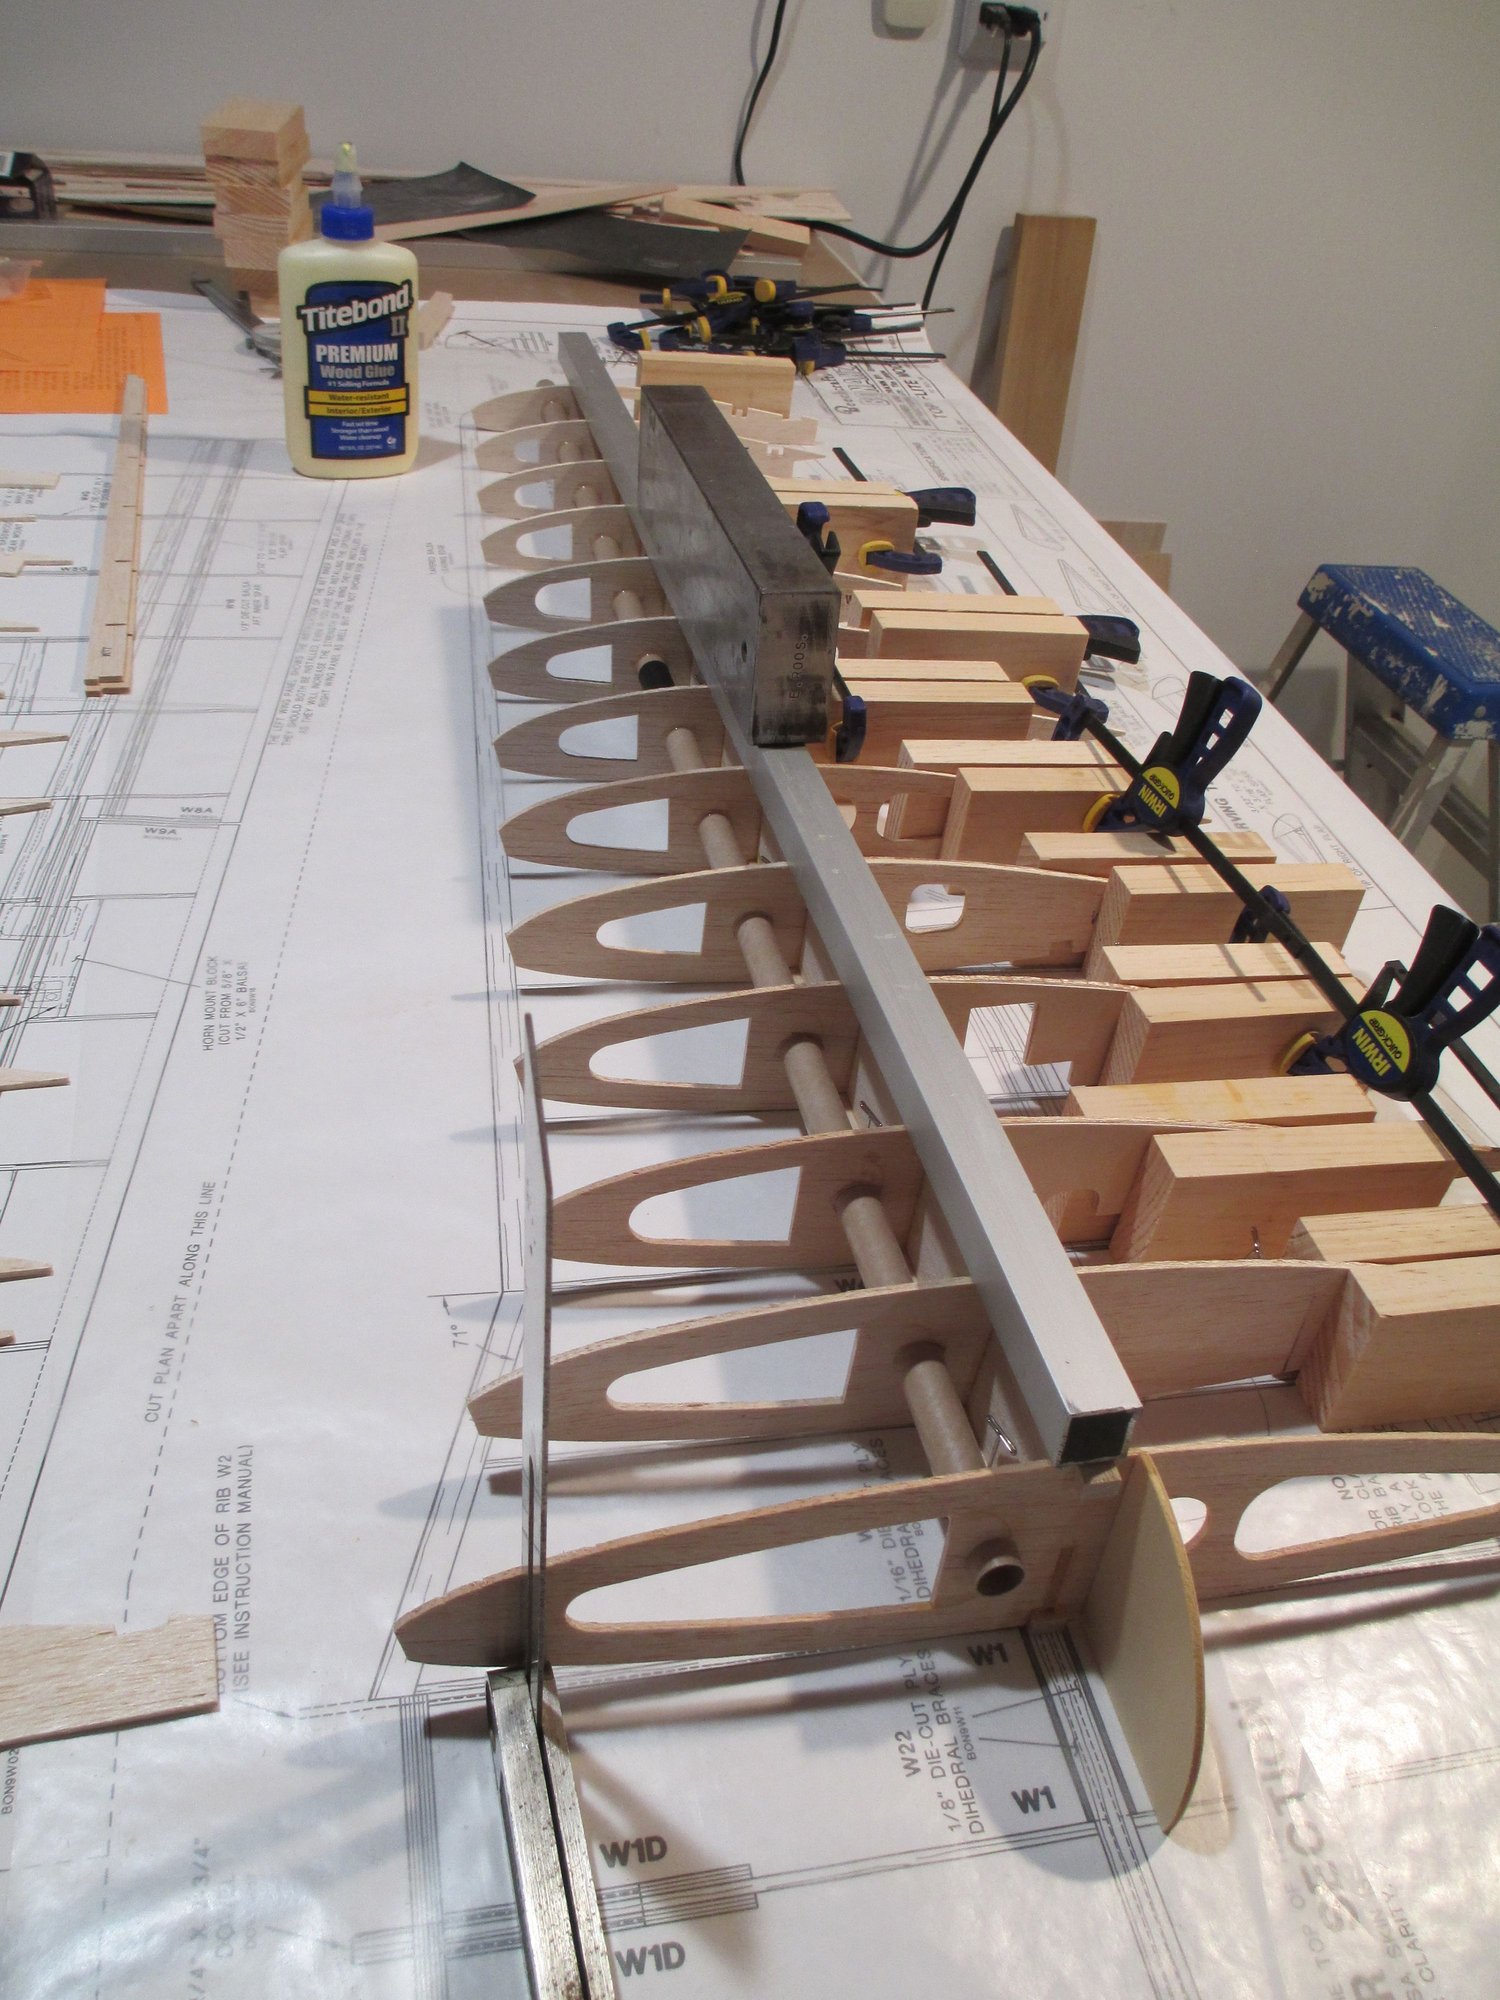
The square aluminum stock on top of the wing was placed directly over the top wing spar which was glued into place. This will ensure the spar is making full contact with the webbing beneath.
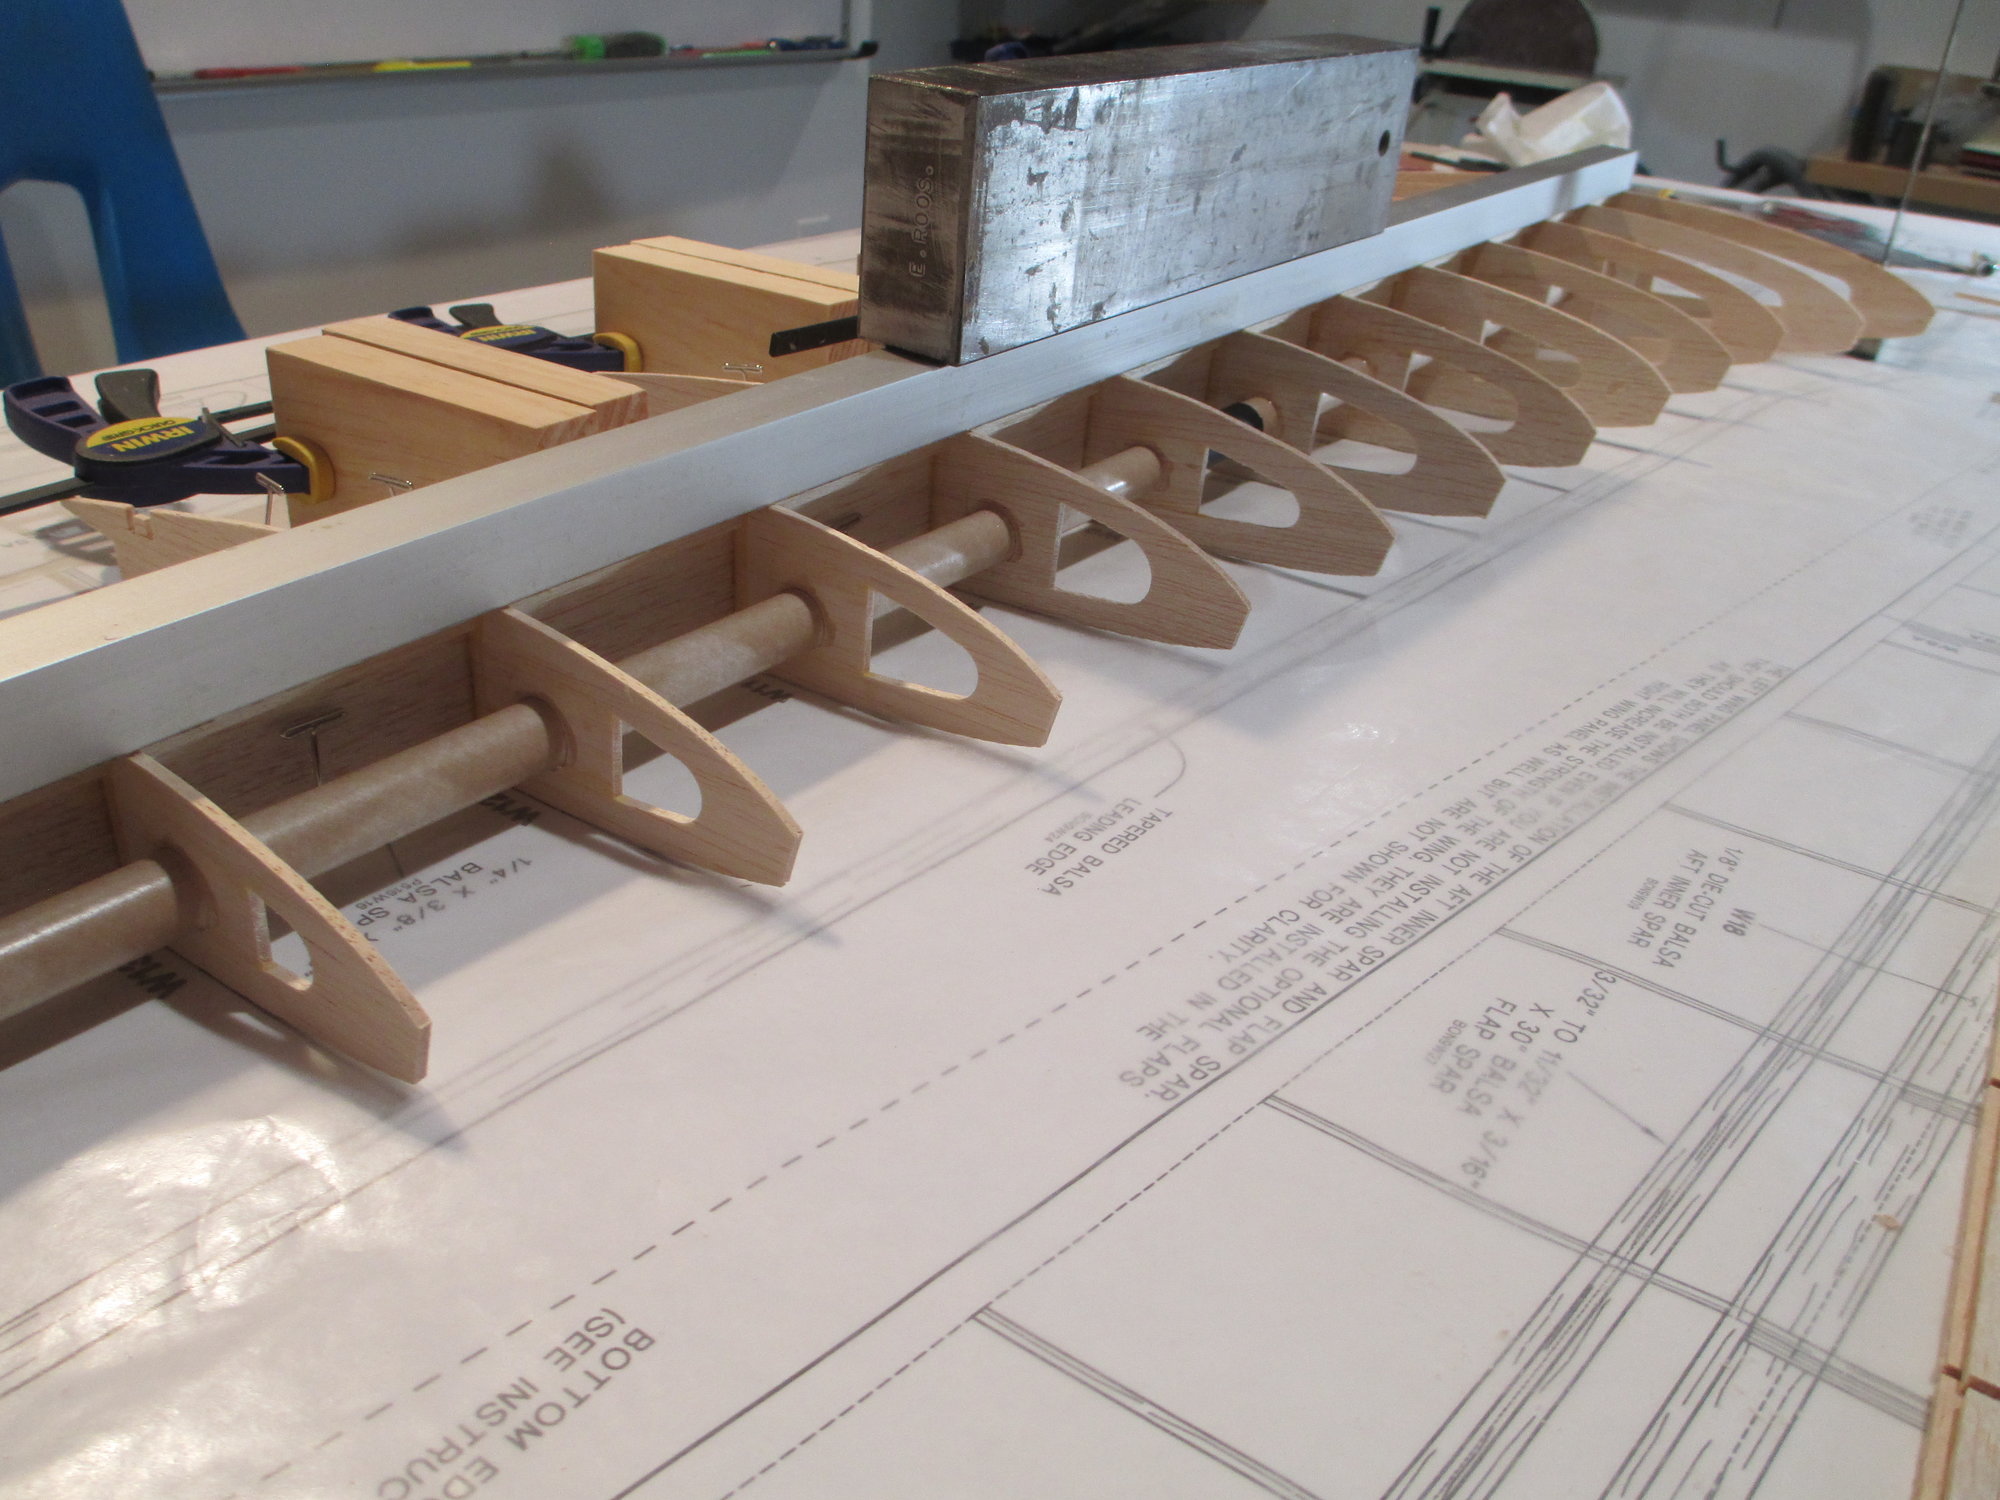

The rocket tubes aren't long enough to span the length of the wing. To splice them together, I used a short length of 3/4" heat shrink tube.
Last edited by VincentJ; 07-19-2019 at 04:55 AM.
07-19-2019, 08:19 AM
#124
Thread Starter